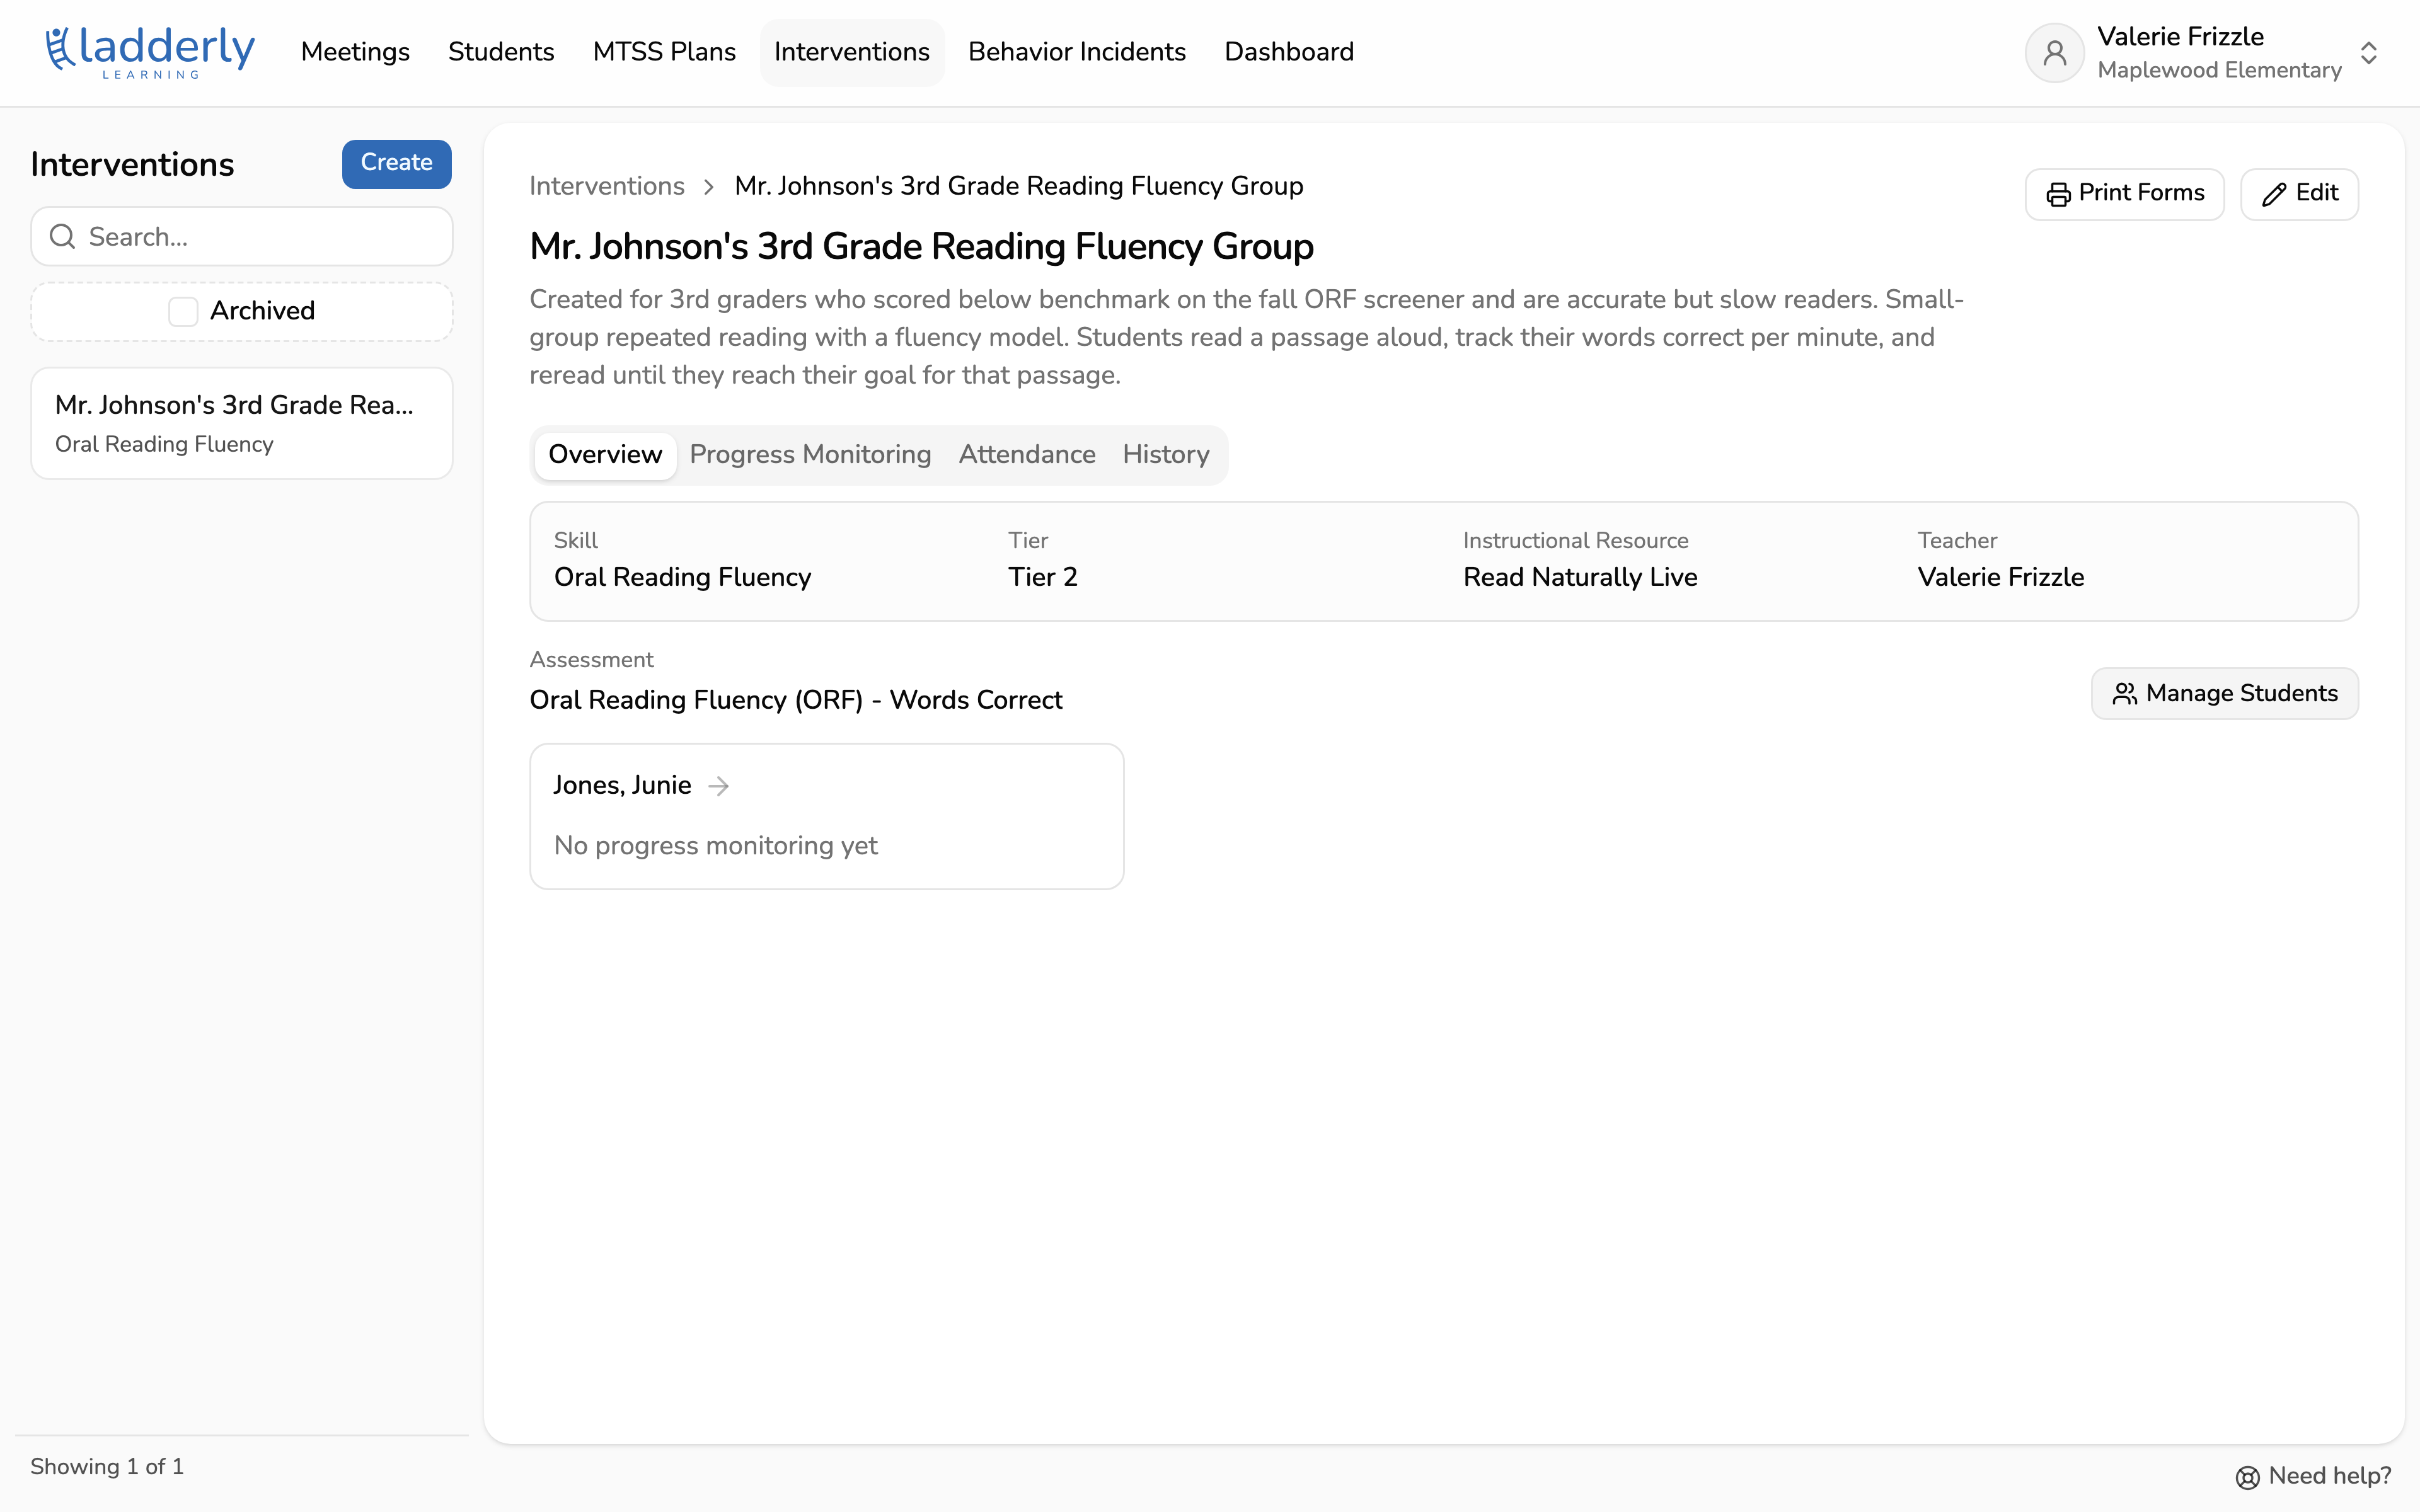
Create an intervention
A step-by-step guide for interventionists to add a new intervention to the school's library.
An intervention is the group or service a student actually receives: who teaches it, what it targets, how often it meets, and how progress is measured. Once it exists, students can be added and progress monitoring can be logged.
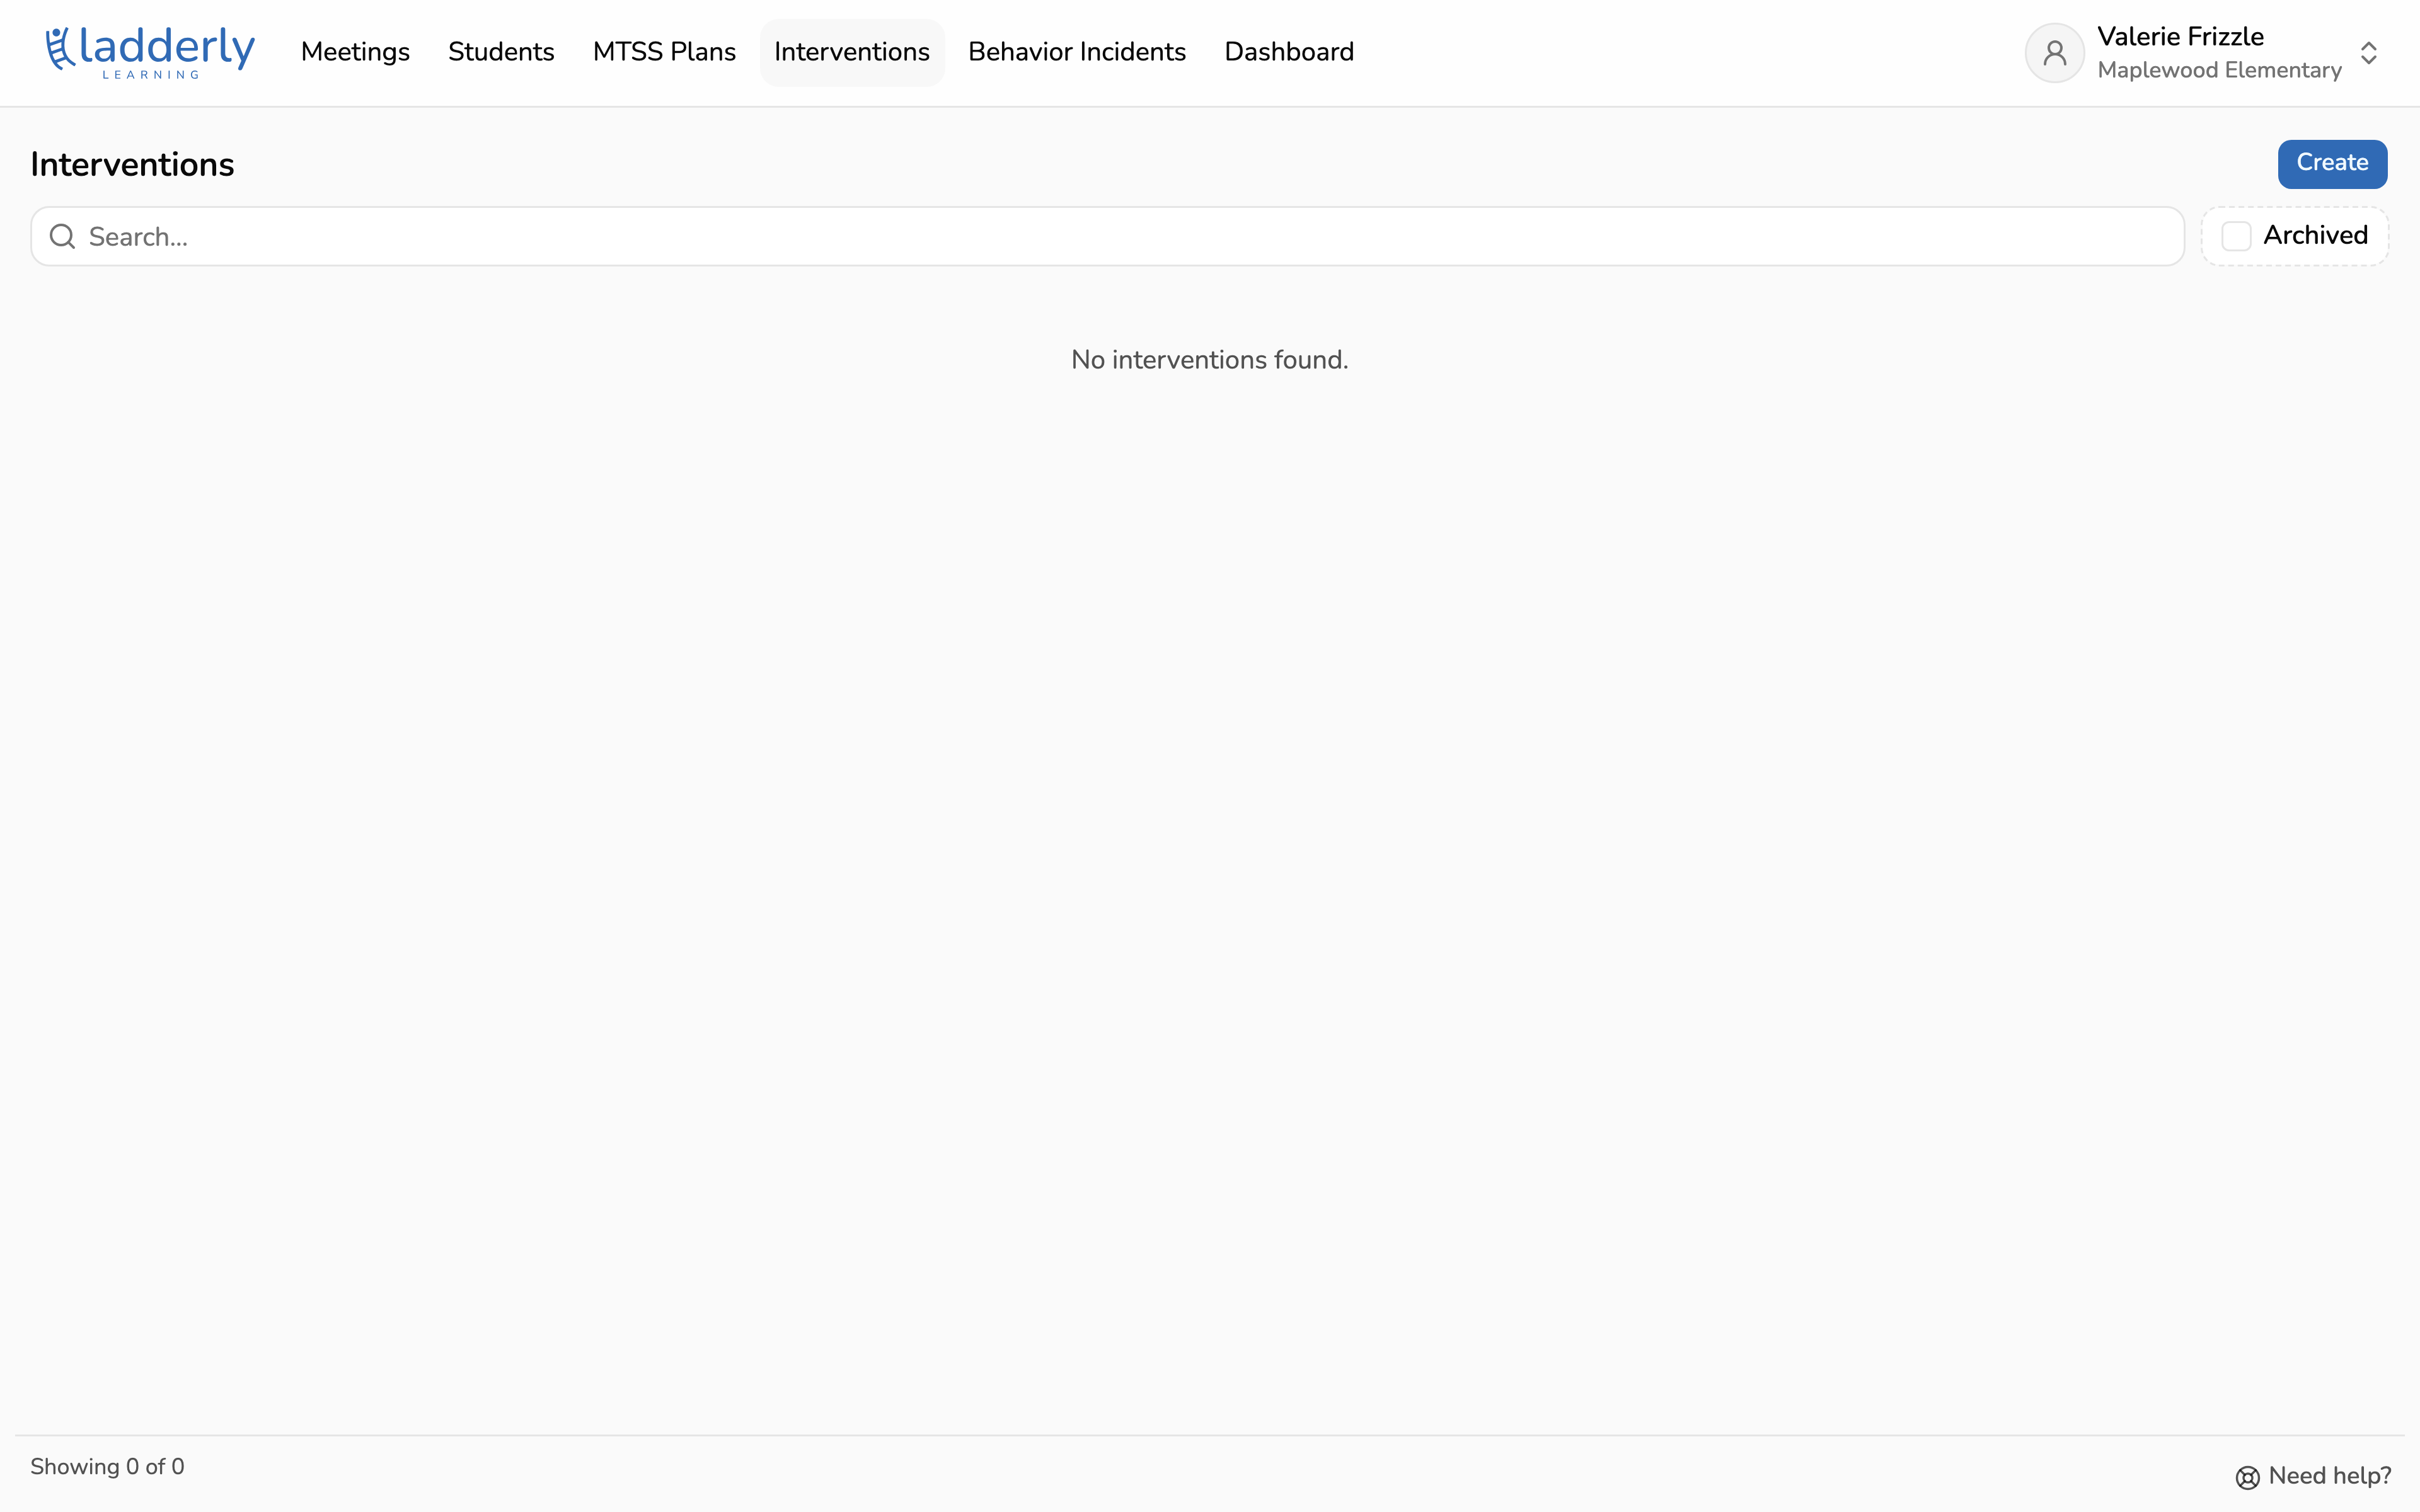
1. Open Interventions
Open Interventions in the top navigation to see the interventions you work with. Choose Create to add a new one.
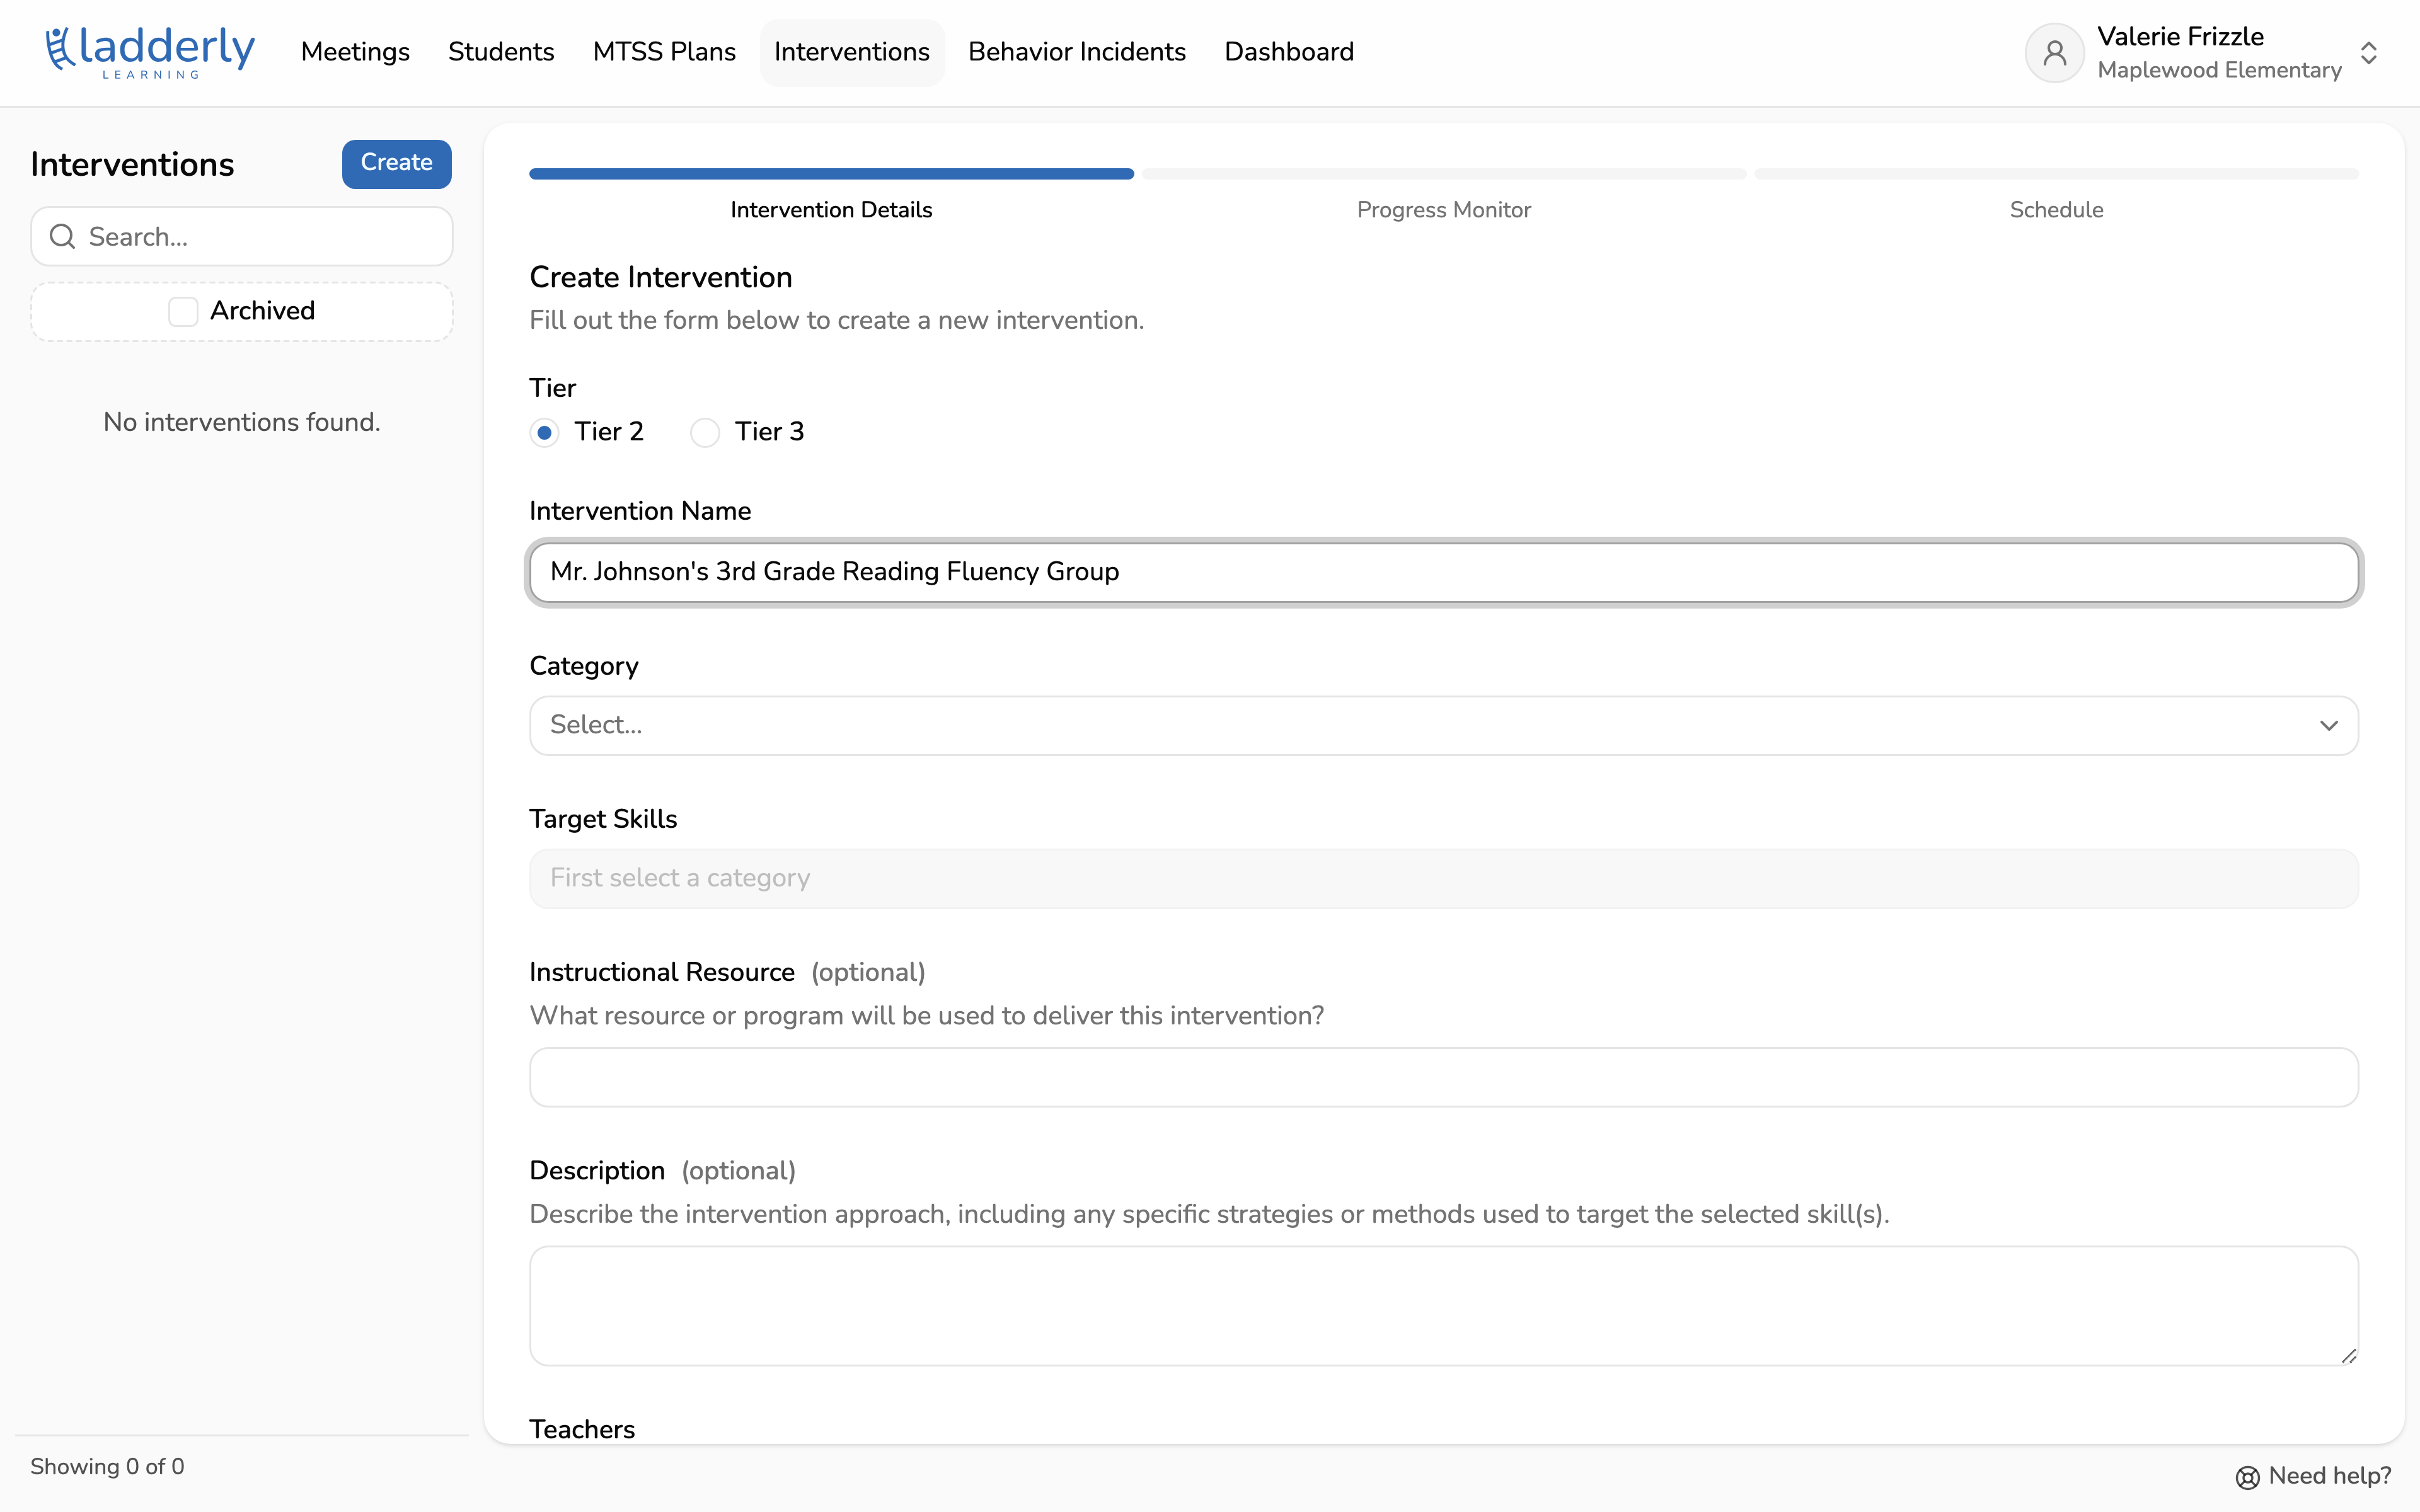
2. Name it and choose the tier
Use a name your team will recognize in a list, like the group or program name. Some common examples are "4th Grade Oral Reading Fluency" or "Mr. Johnson's 3rd Grade ELA".
Tier 2 is targeted small-group support; Tier 3 is more intensive and usually meets more often.
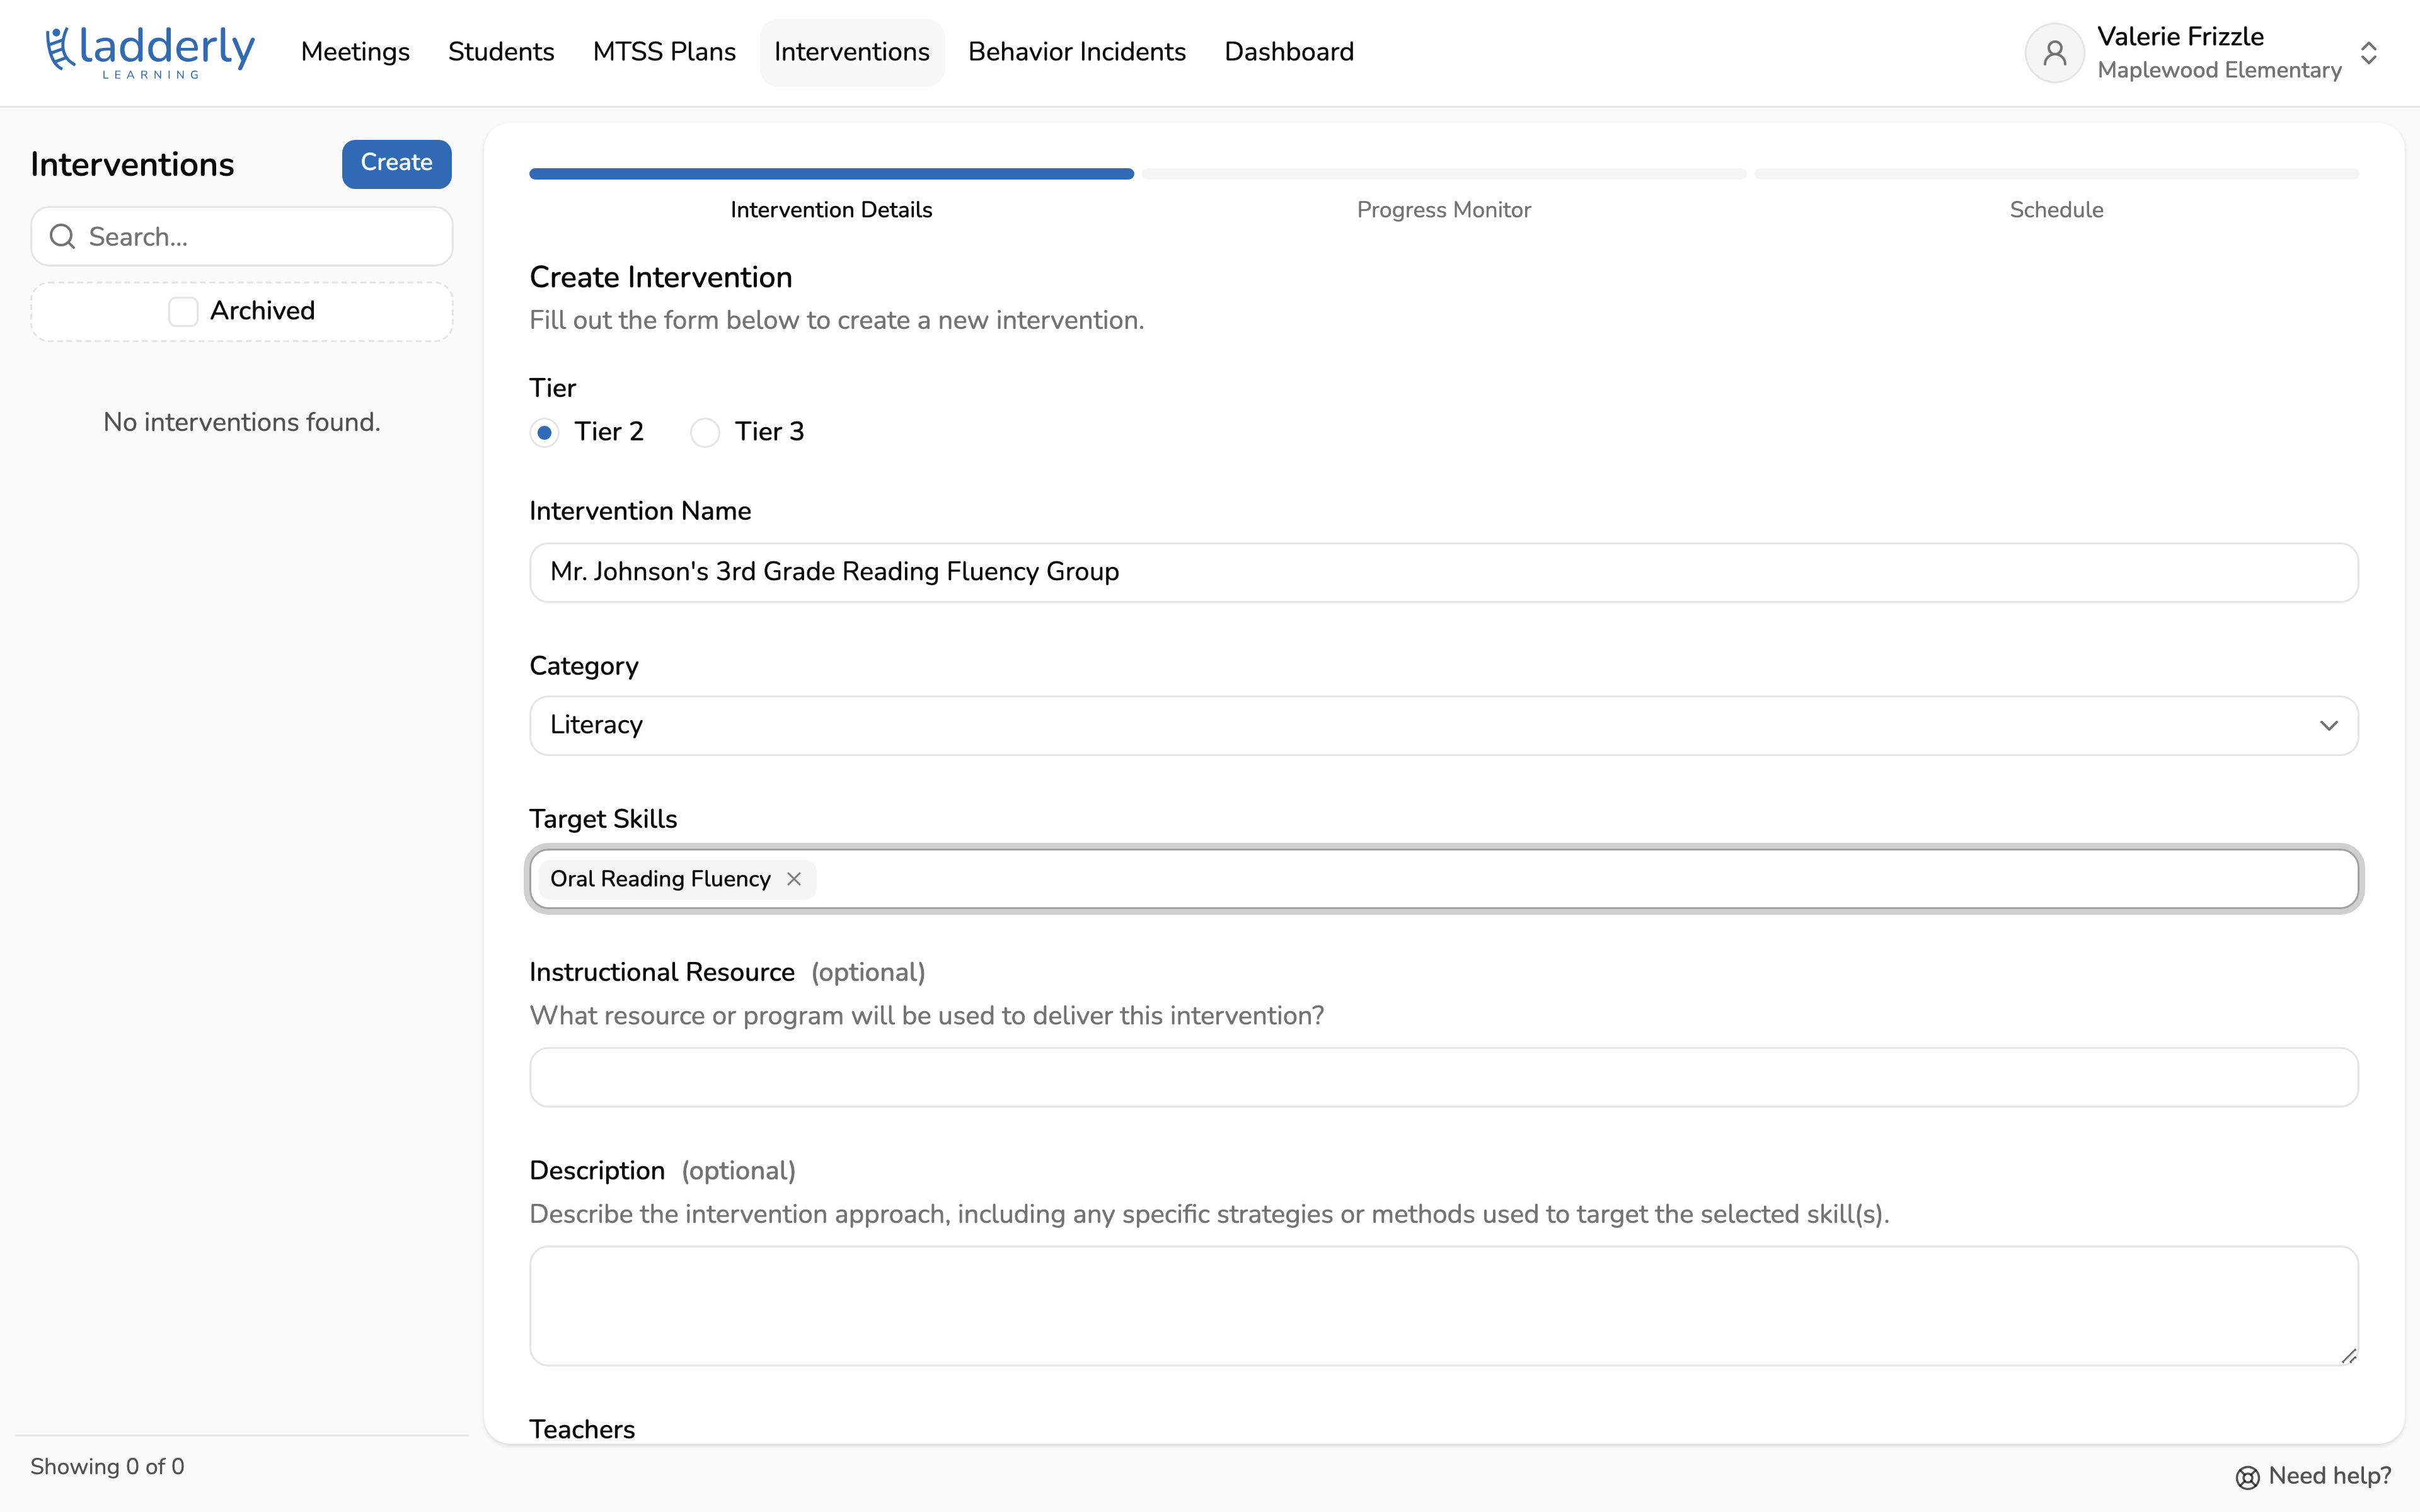
3. Pick the category and skills
The category refers to the subject area this group will focus on such as Literacy, Math, or Behavior. The category decides which skills and assessments you can add to the intervention. Target only the skills this intervention teaches directly. If you don't see the skill you want to add to the list, you can add it by typing in the name of the skill and hitting Enter.
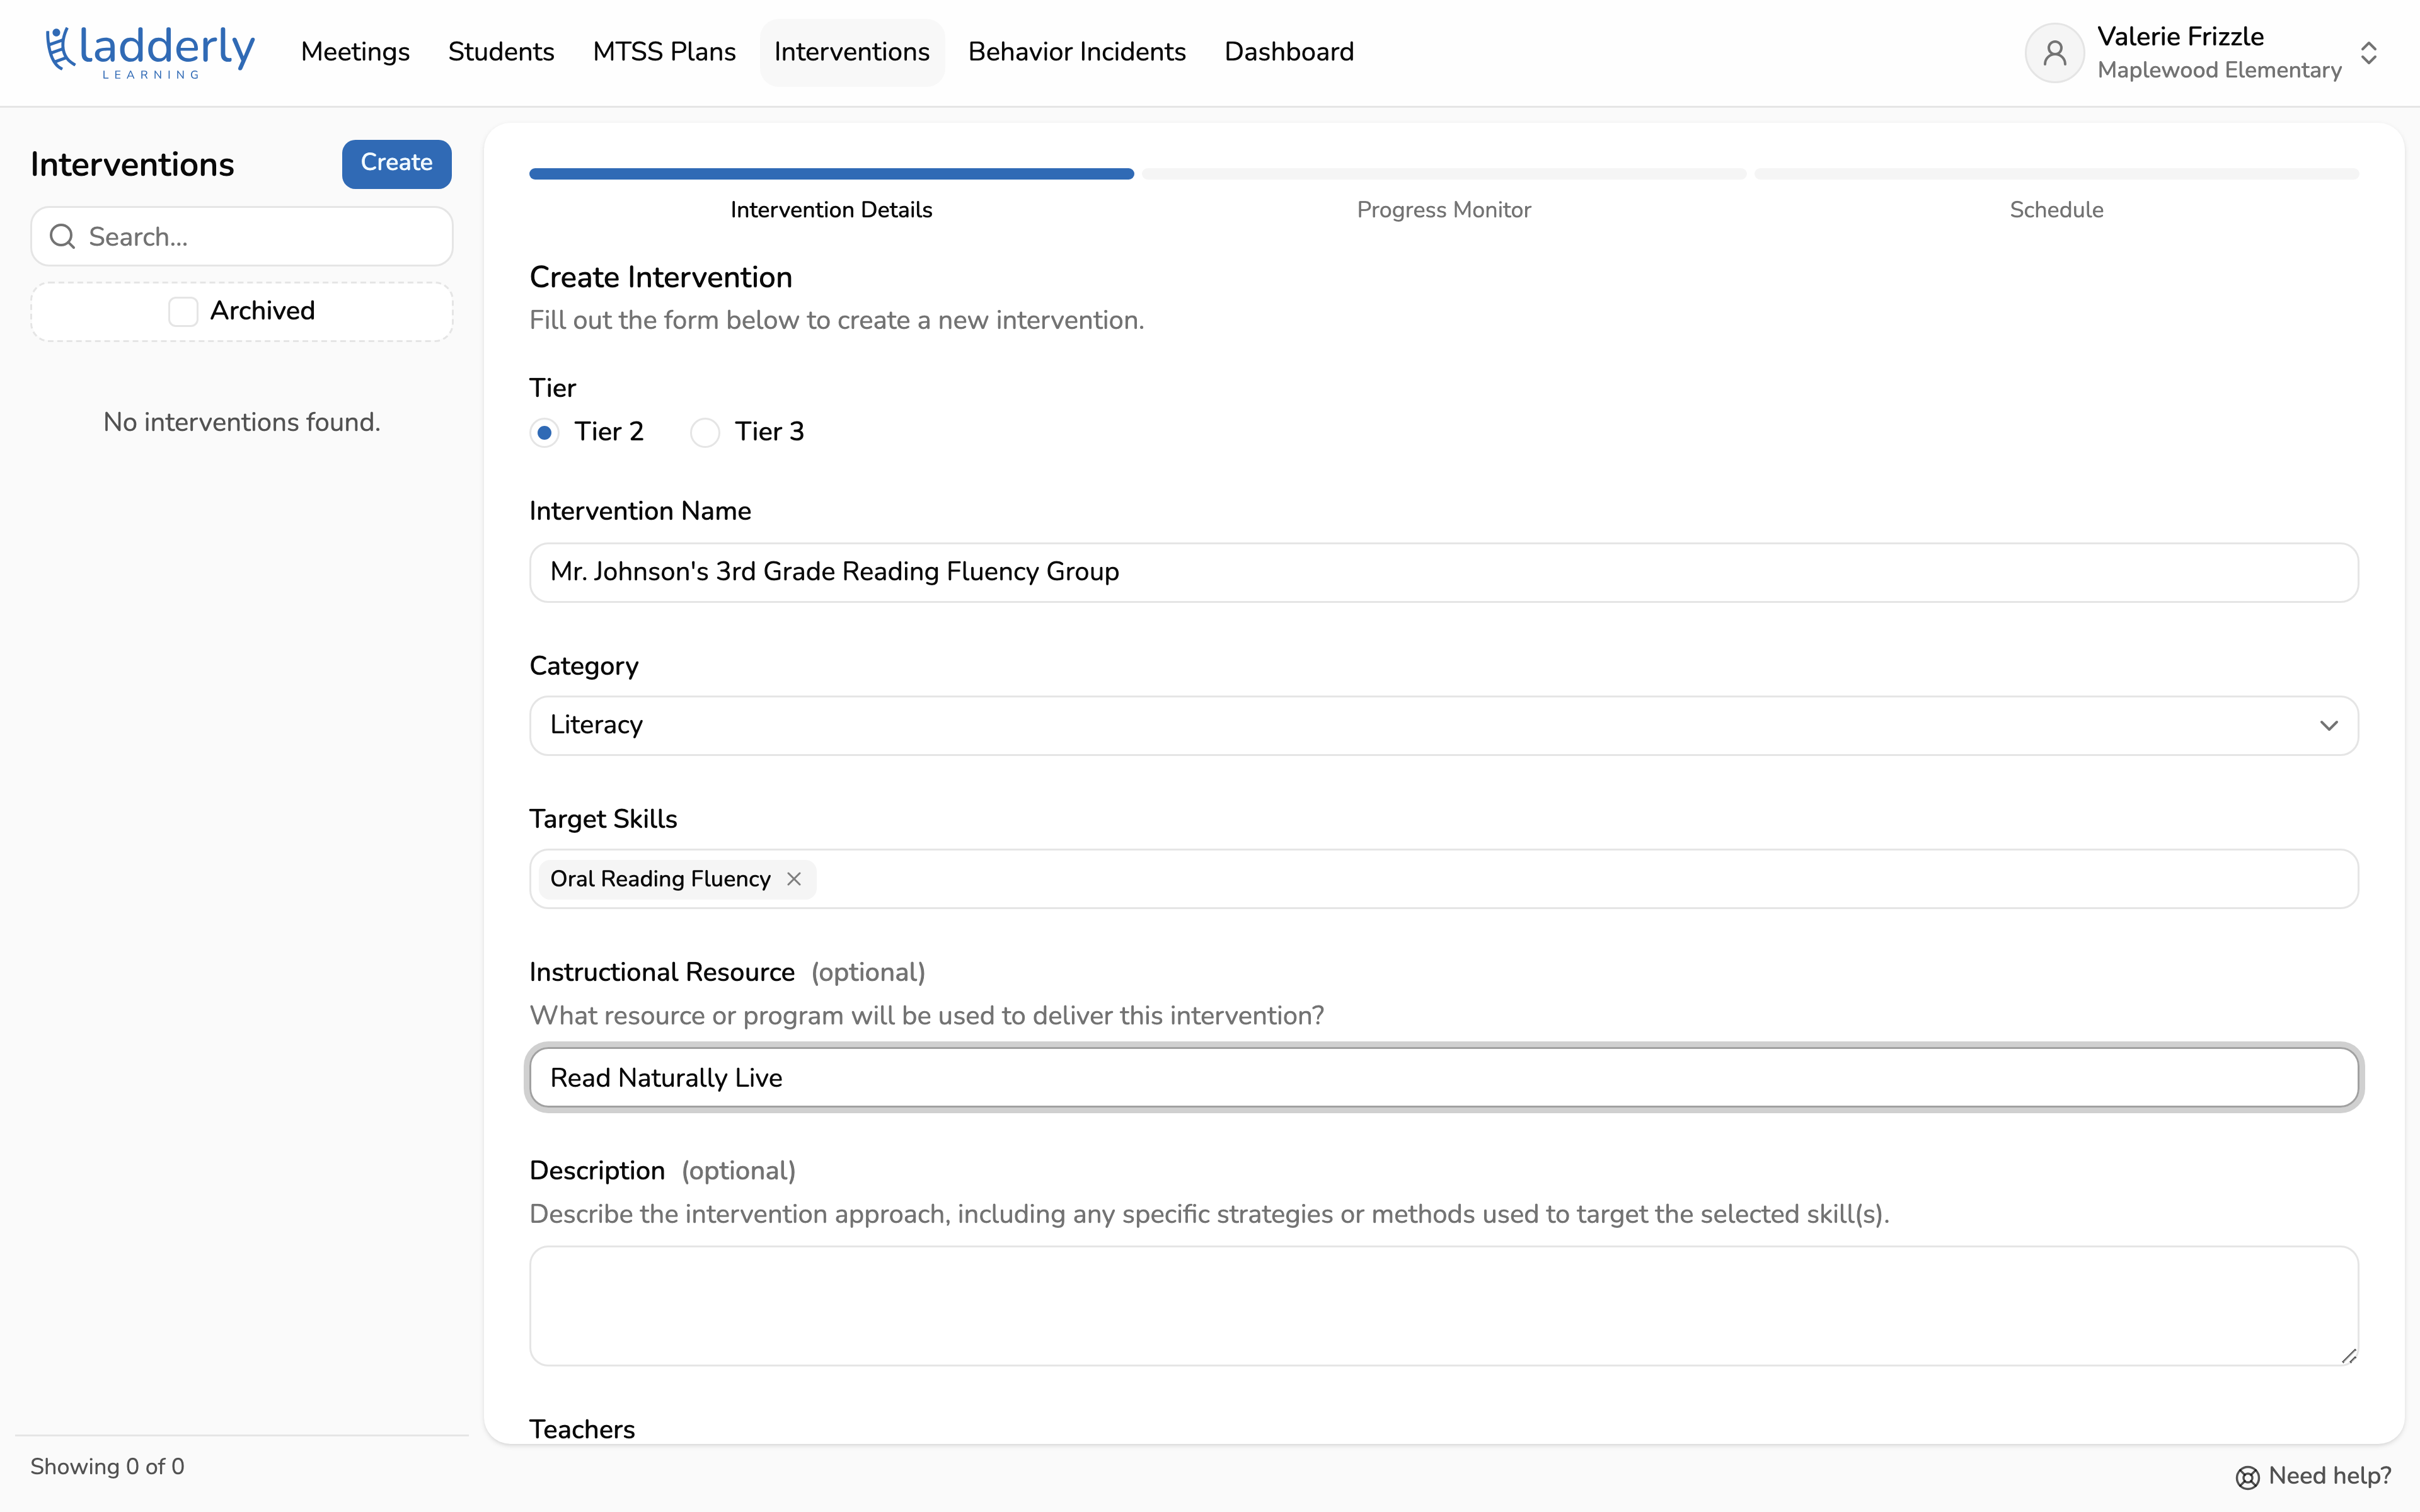
4. Add instructional resources
Name the program or curriculum you will use to teach the group. This is an optional free text field. It shows on the intervention and on each student's progress page, so anyone reviewing the data knows what was taught.
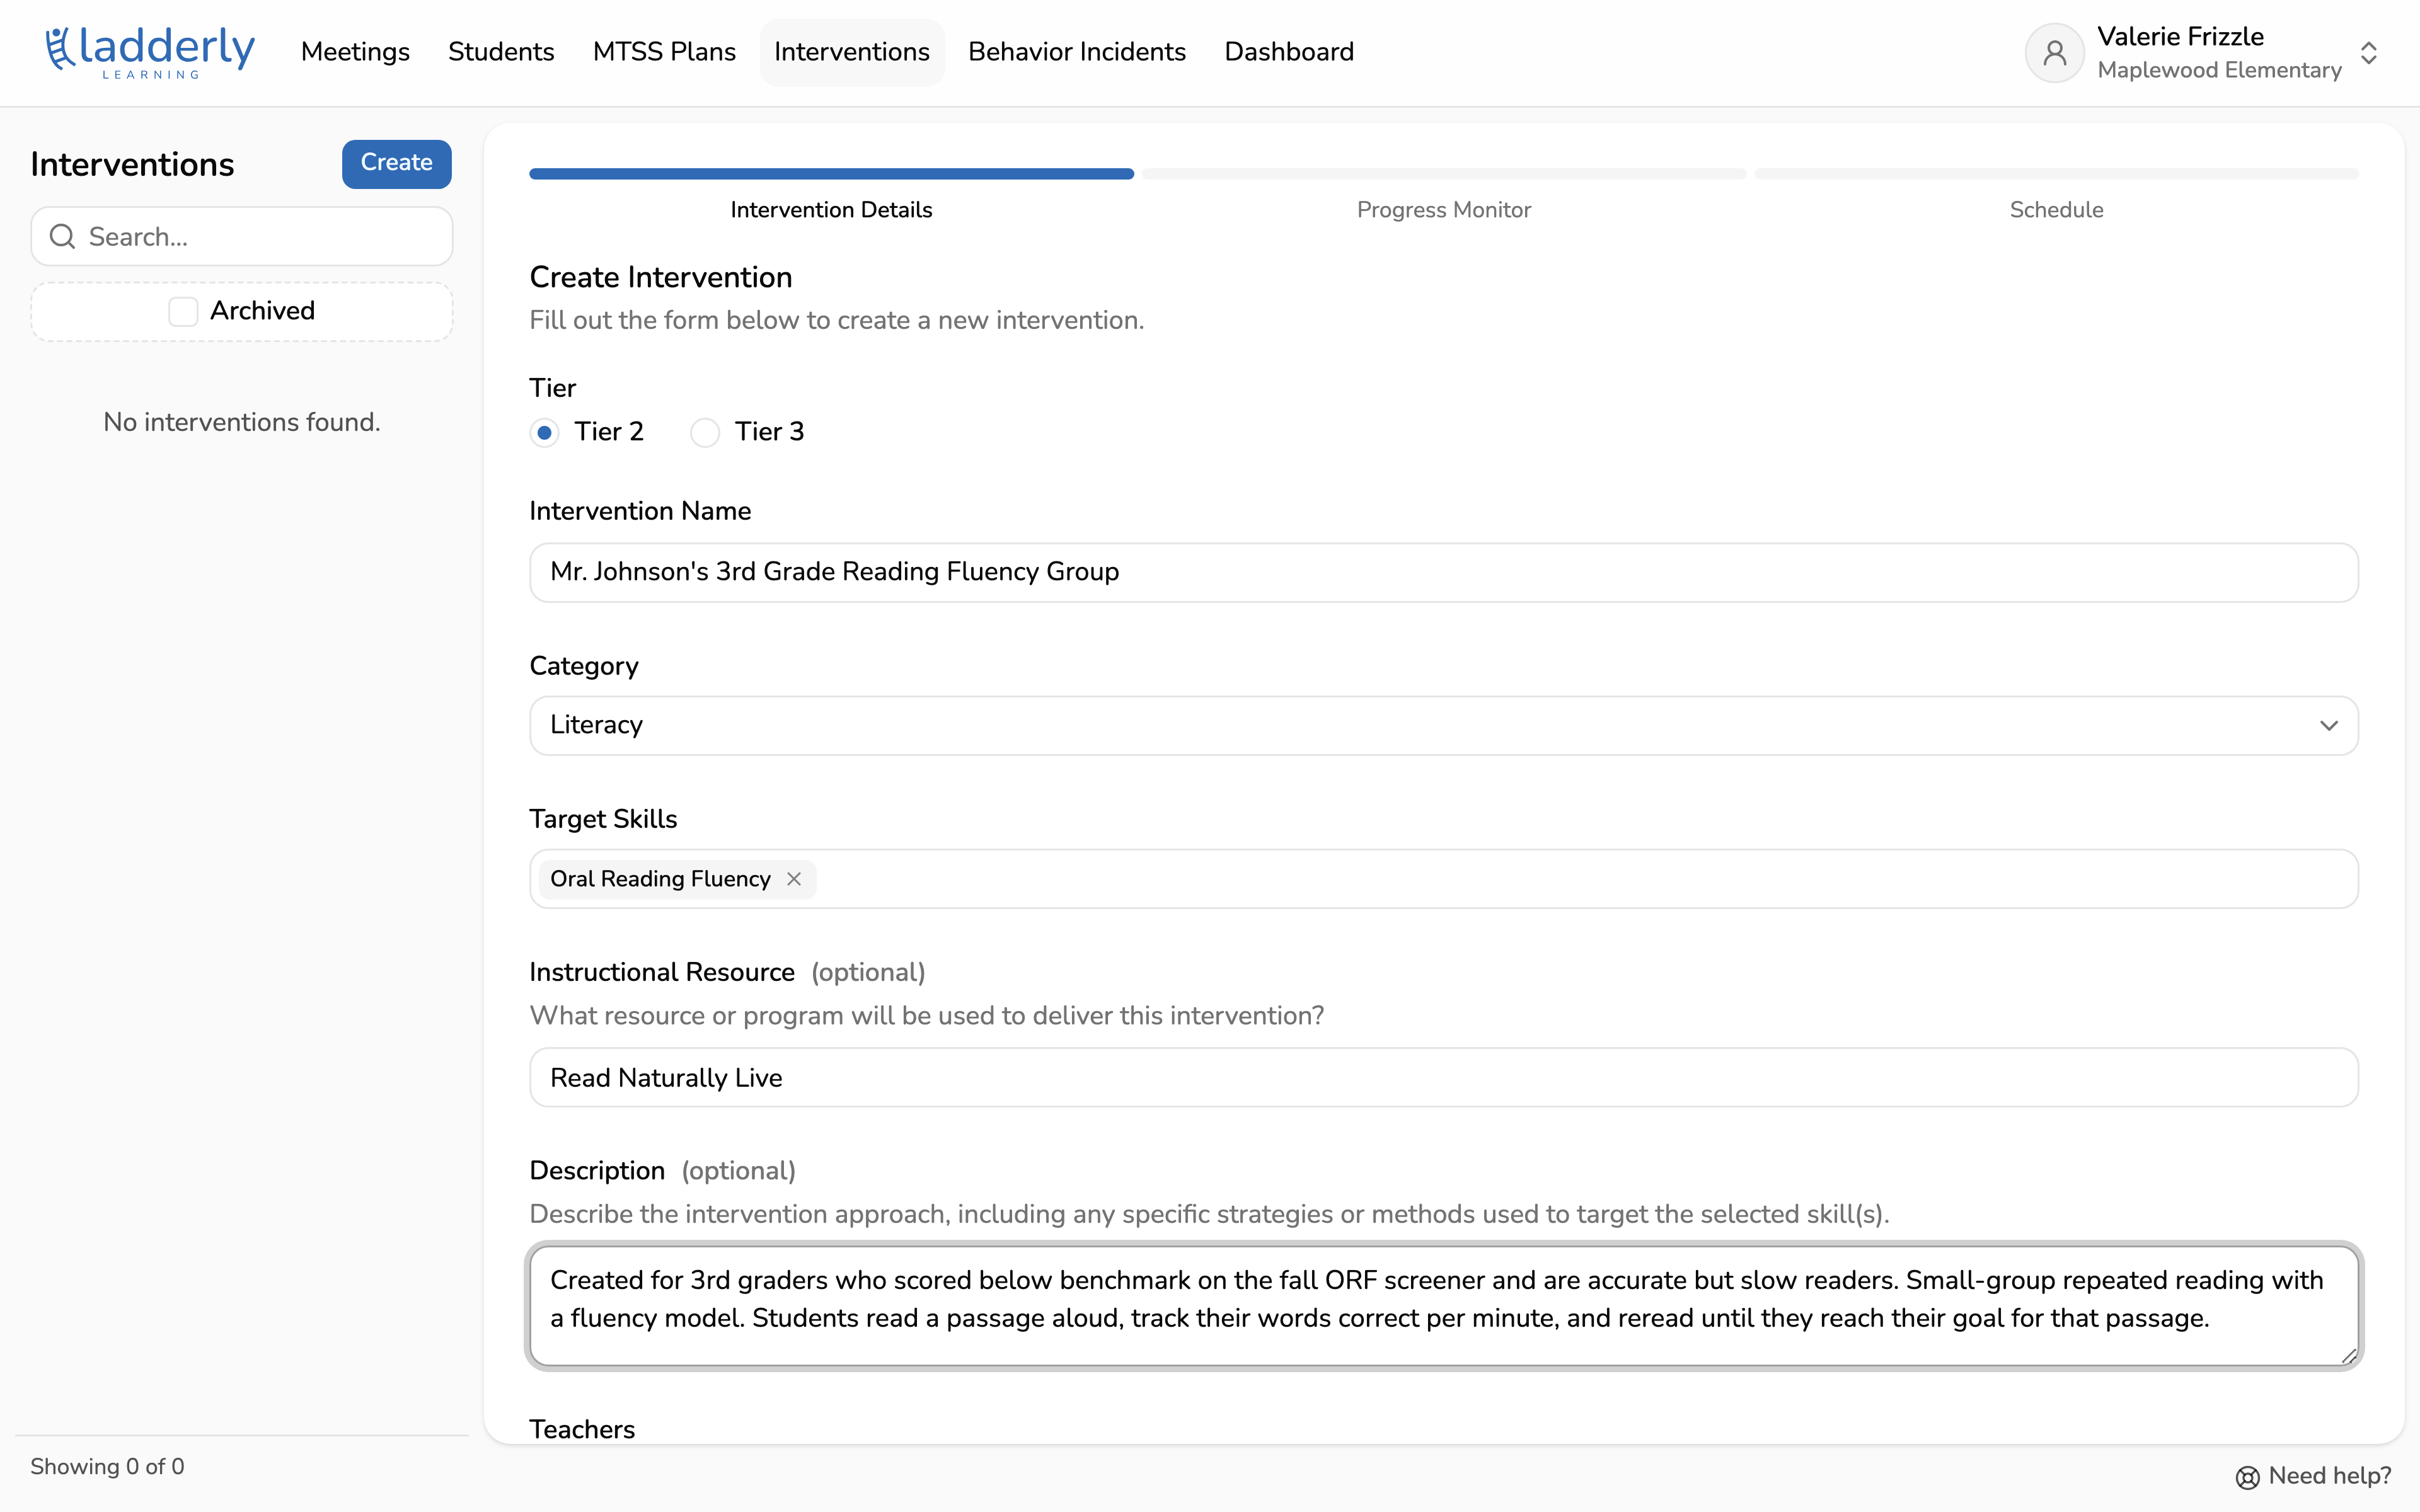
5. Describe the intervention
Describe key details about this group. Describe why this group was created, what the intervention entails, and any other relevant information that an outside observer might want to know about it.
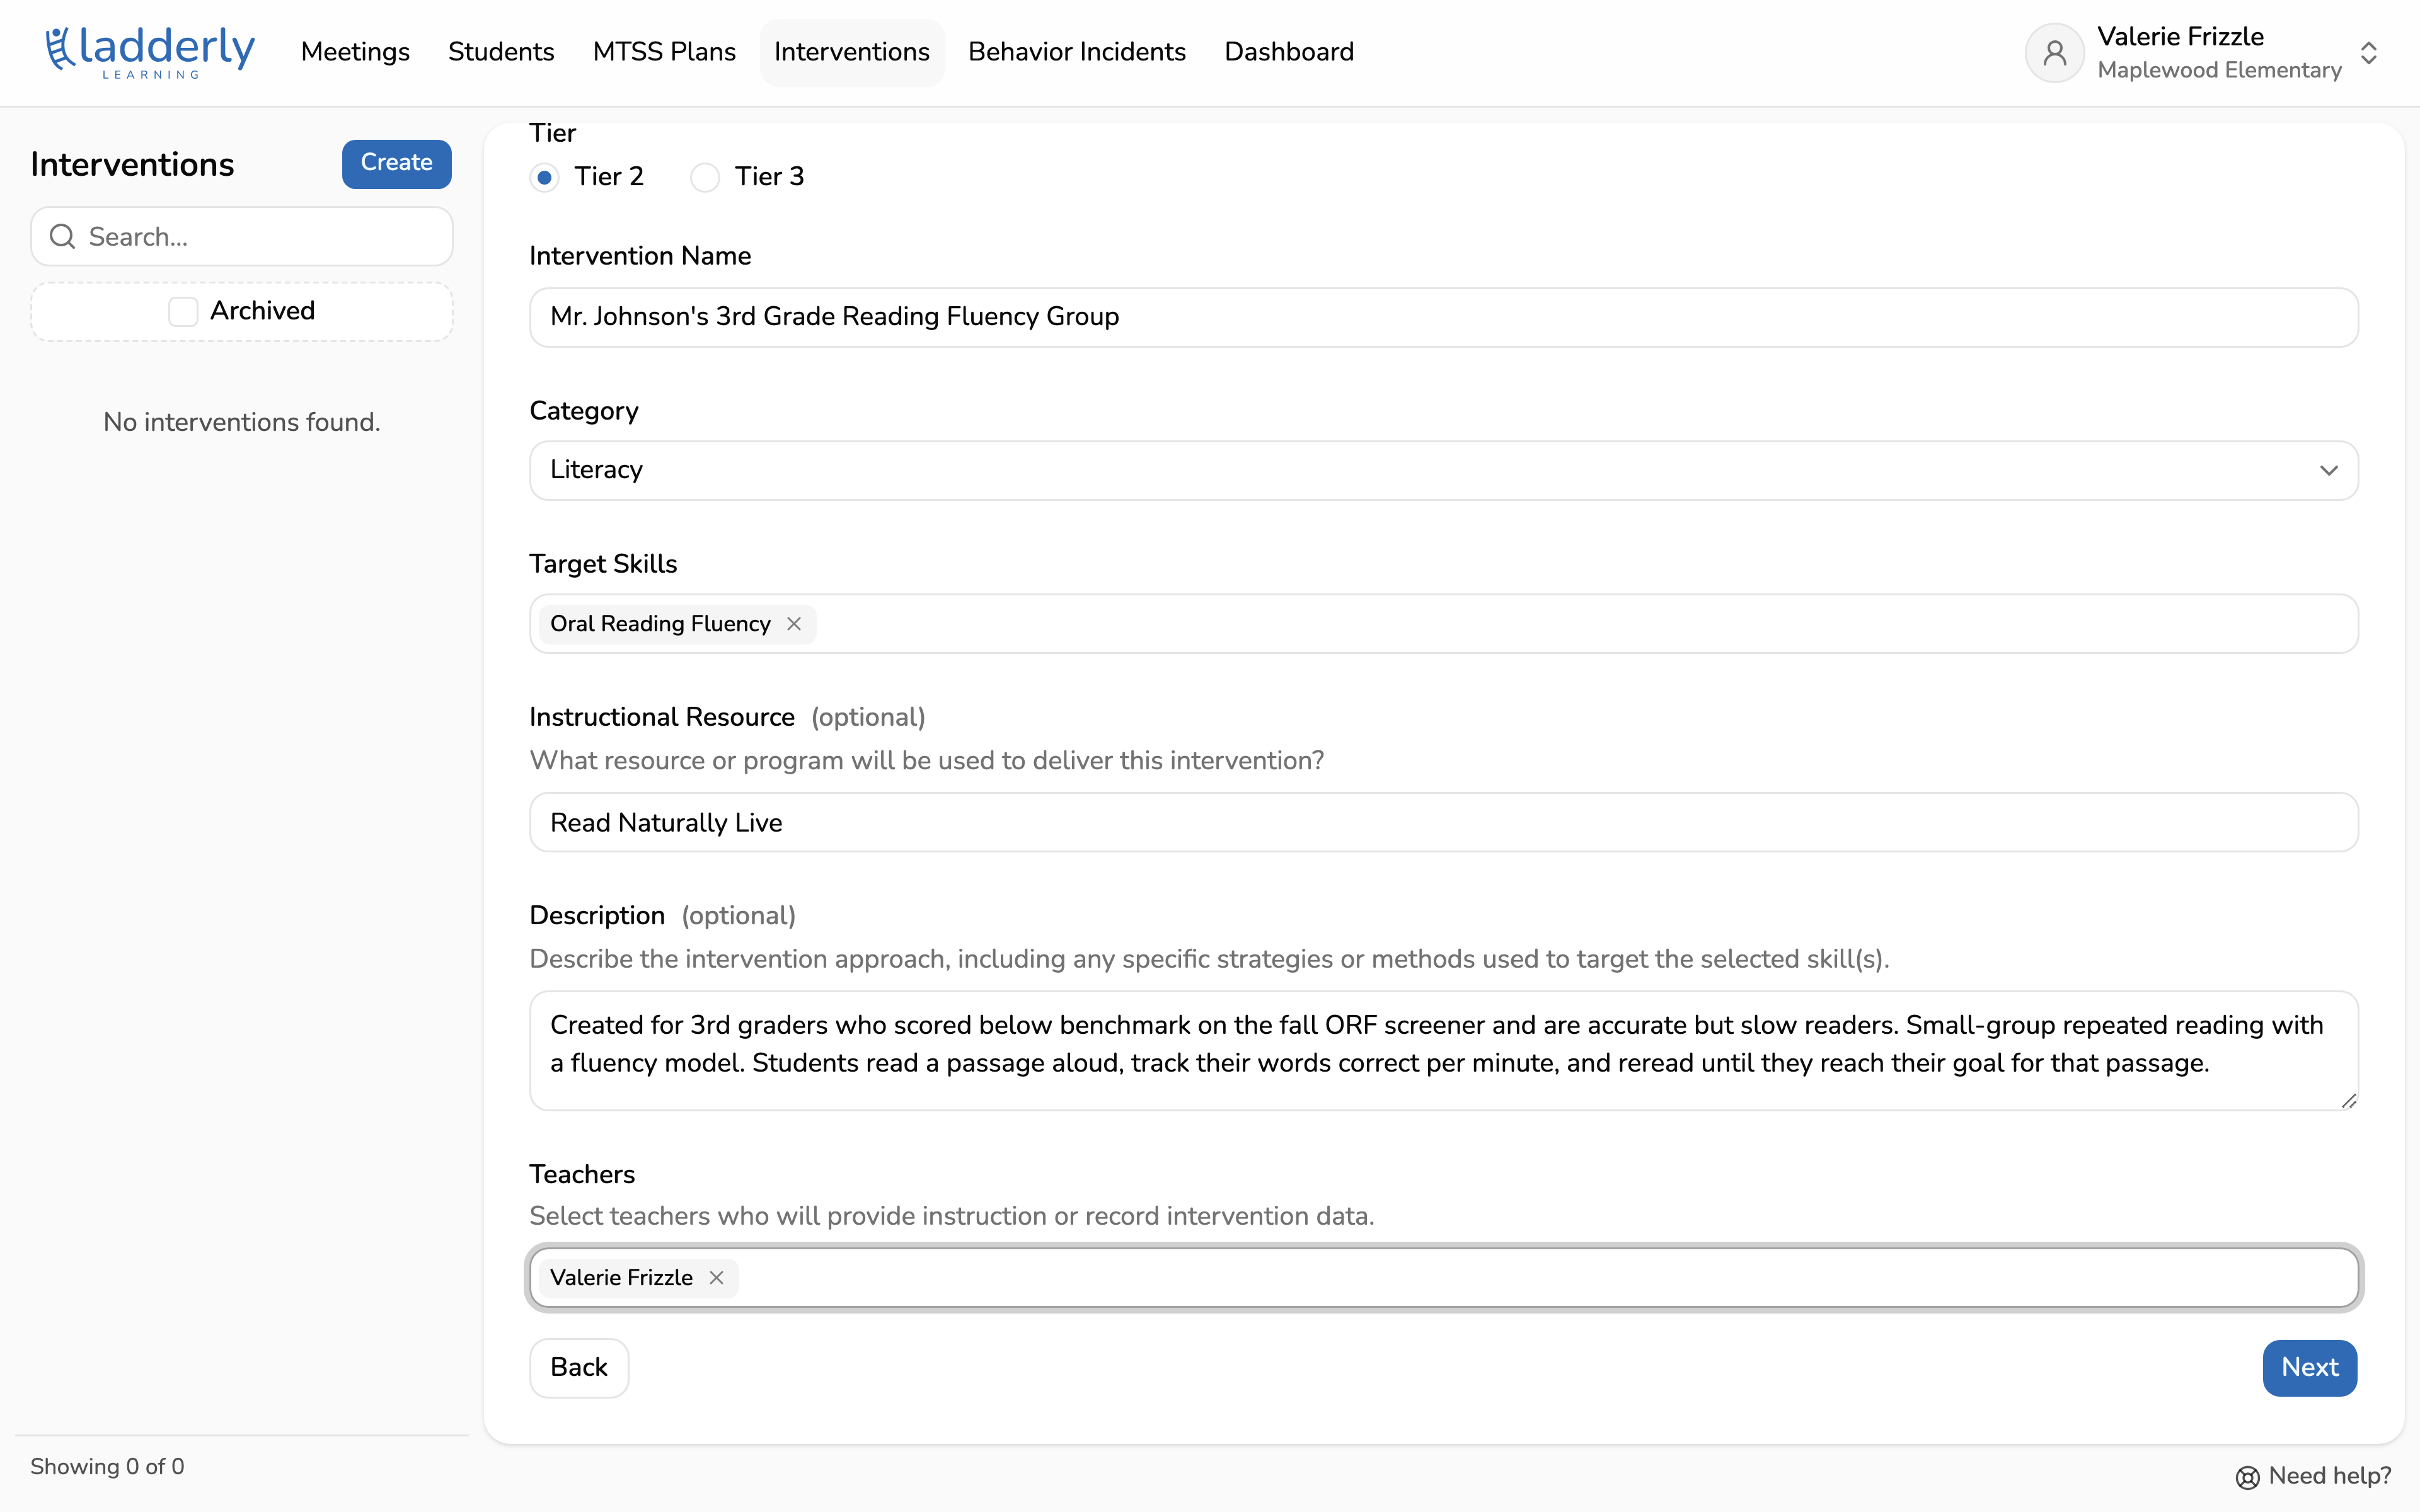
6. Add teachers
Add everyone who will run the group or record its data. This can include co-teachers, aides, or other support staff. Only these teachers, the students' teacher, MTSS team members, and School Admin can log attendance and scores. Choose Next when you're done.
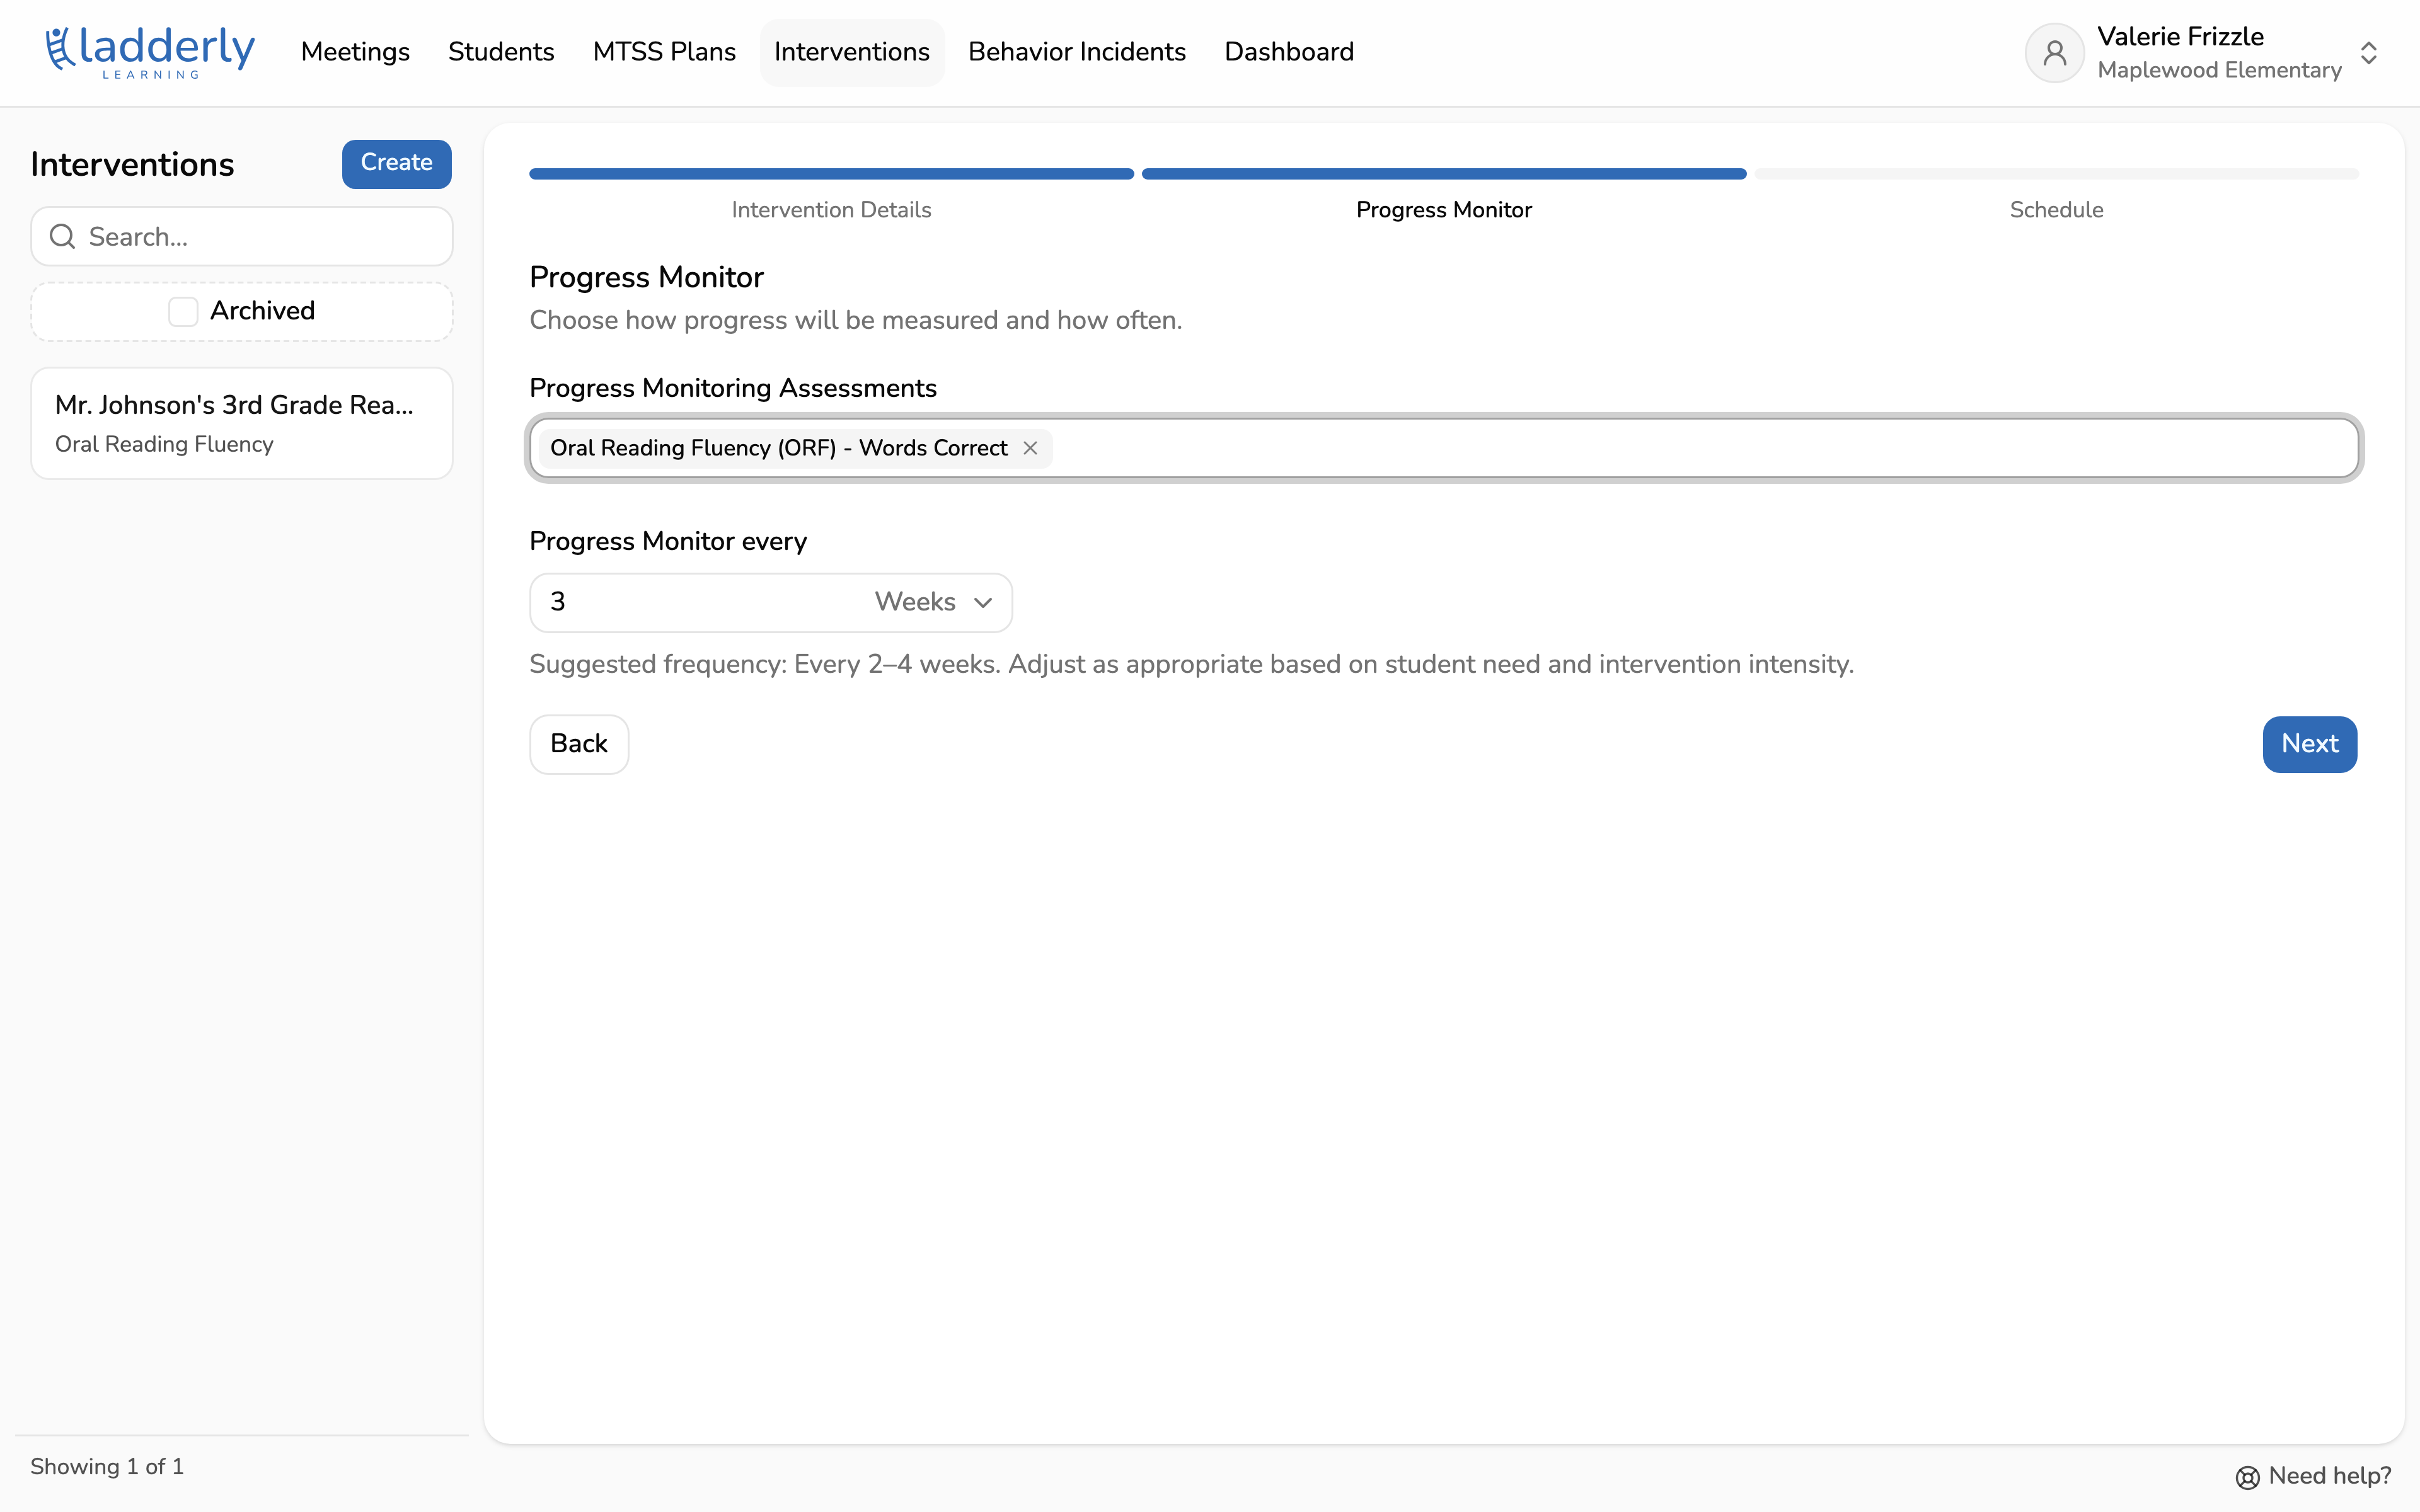
7. Choose progress monitors
Pick the assessment(s) you will give to monitor progress, and how often you will give it.
The frequency of progress monitoring set on this page does not inhibit you from giving assessments more frequently if desired. It is just used to determine how frequently the system will notify you to log more progress monitoring data.
Don't see your assessment?
Type the assessment's name in the box and press Enter (or choose Create "your assessment name"). In the window that opens, add the Unit the assessment is scored in, such as percent, wpm (words per minute), or points, then choose Submit. The new assessment is added to this intervention and to your school's list for next time.
8. Set the schedule
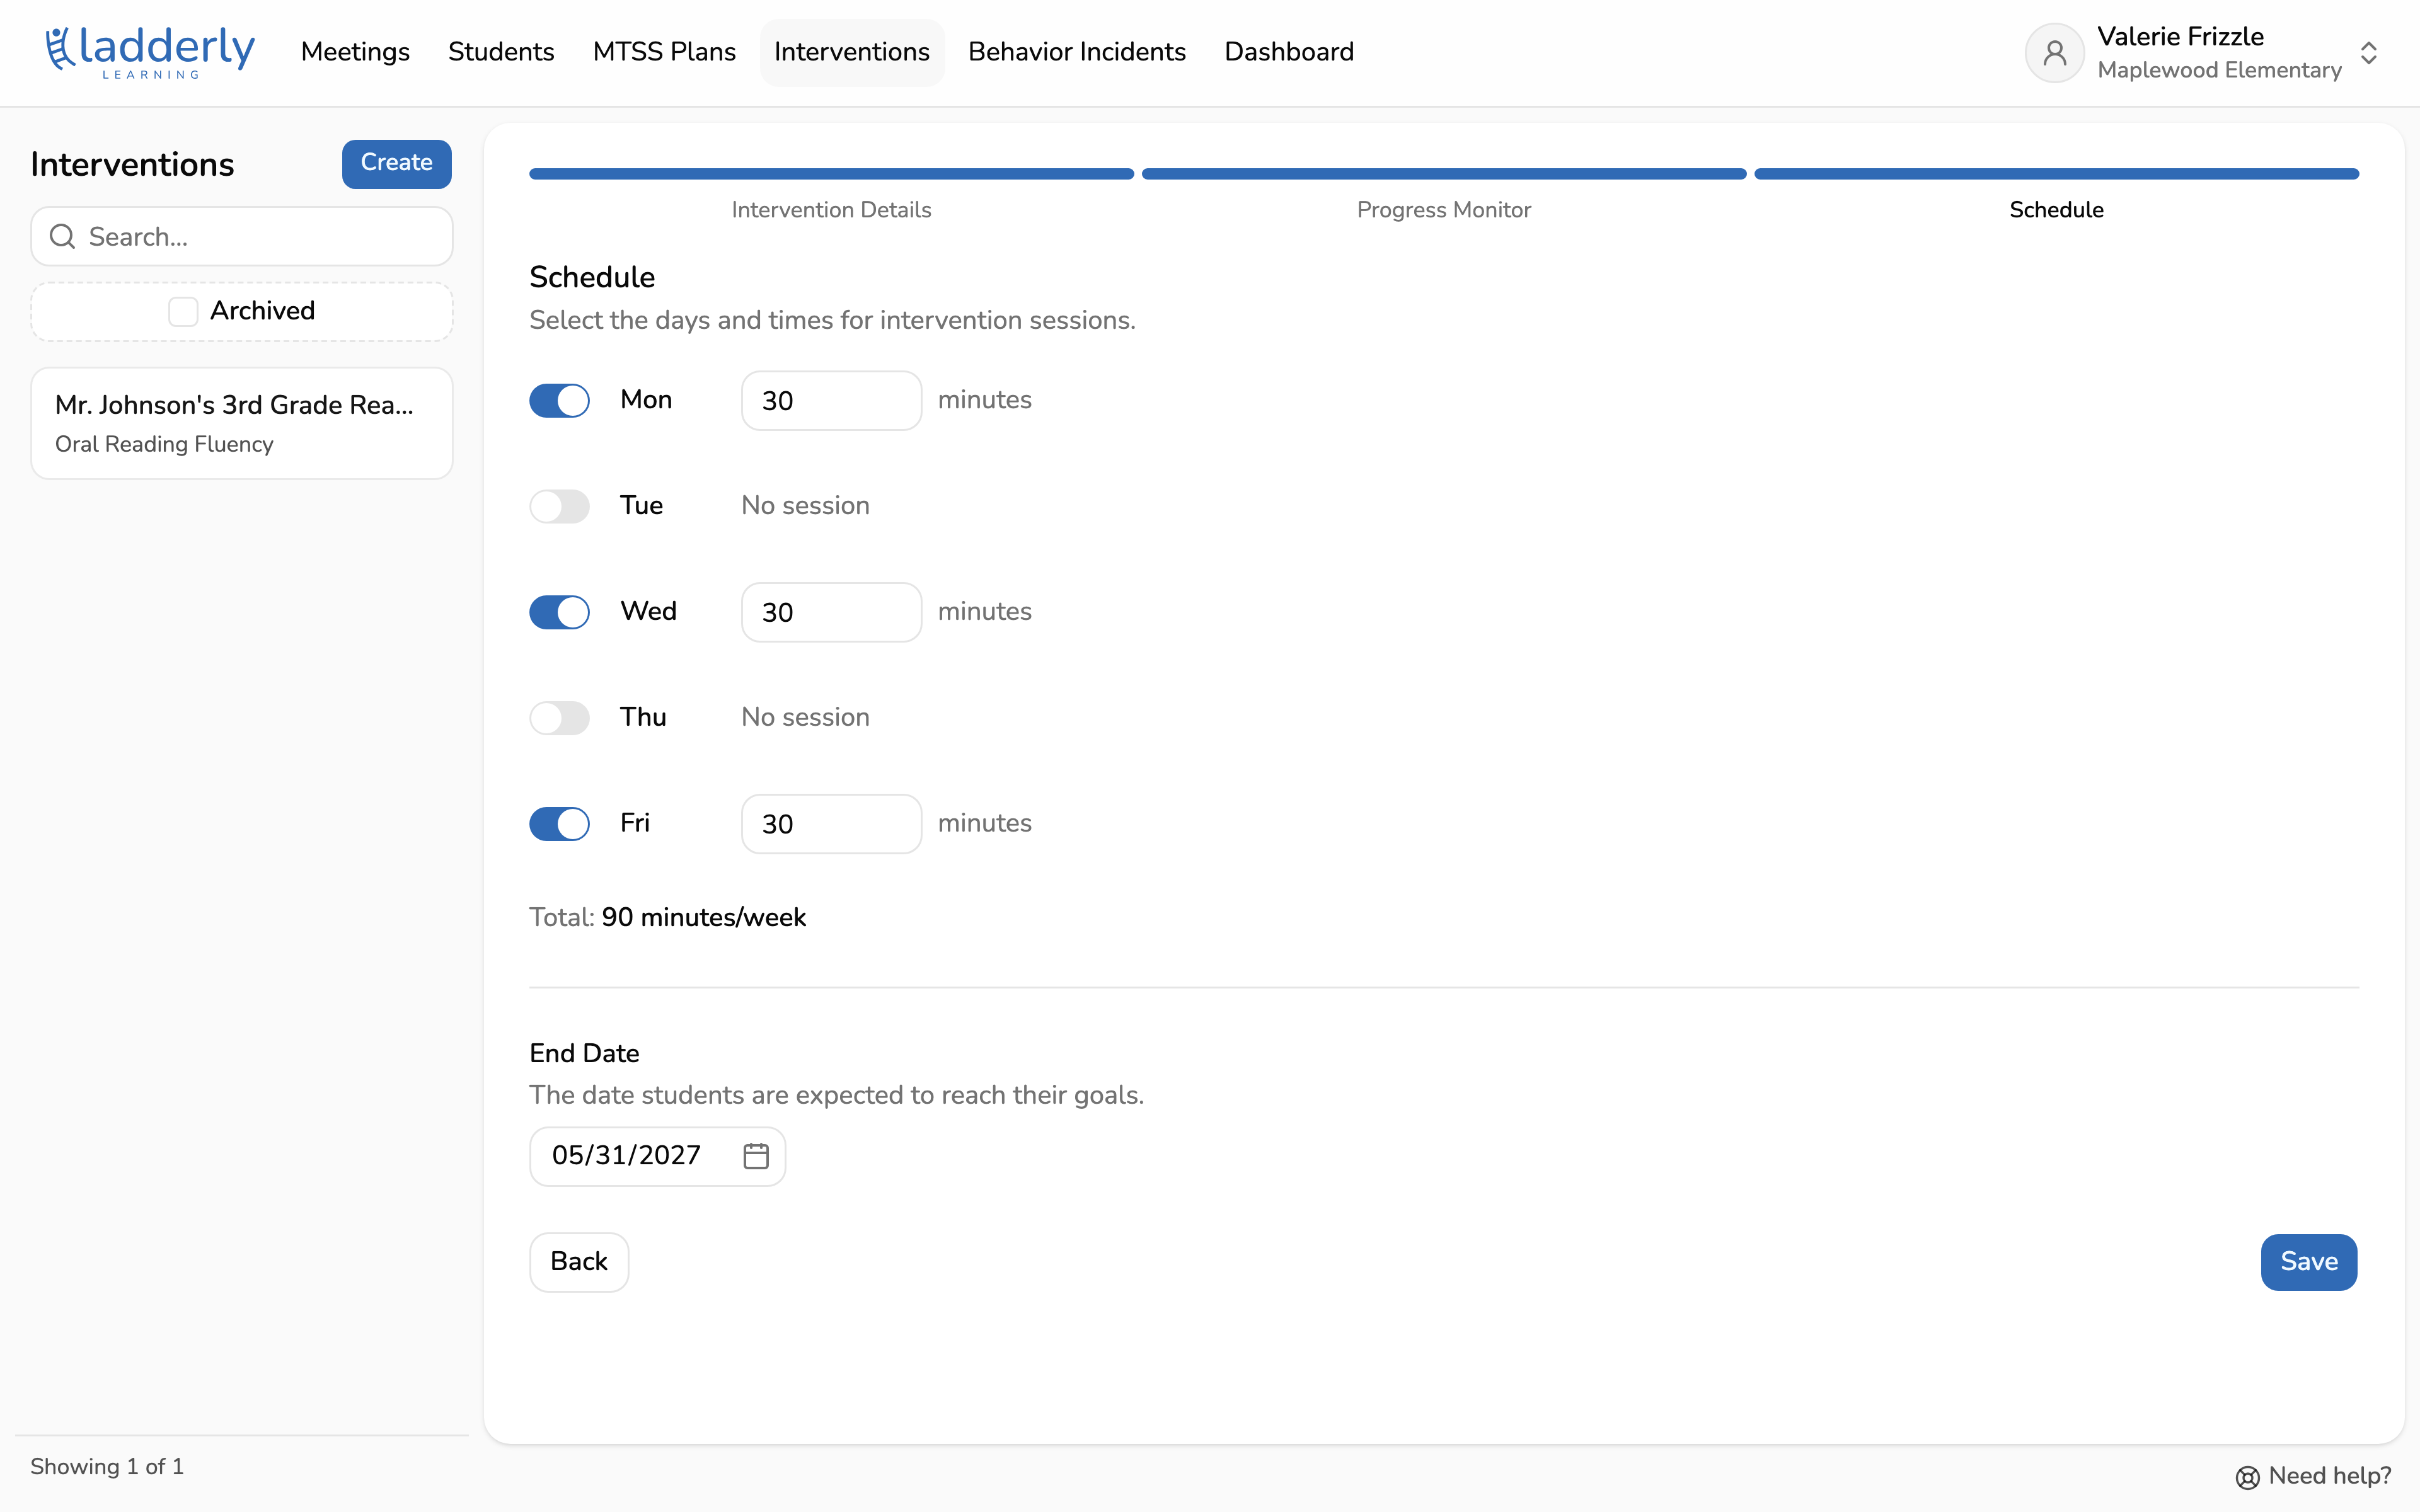
Turn on the days the group meets and set how long each session runs. These days become the columns you log attendance and scores against.
The end date is when students are expected to reach their goals. In many cases this will be the end of the school year.
What if we only meet every other week?
Turn on the day anyway. For example, if the group meets every other Monday, turn Monday on. On the Mondays the group doesn't meet, leave attendance blank rather than marking students absent. Days without attendance don't count toward students' minutes or their attendance rate.
9. Add students and their goals
Search for each student who will receive the intervention. The goal is optional but worth setting since it is the goal line each student's progress chart is measured against. Choose Done to save.
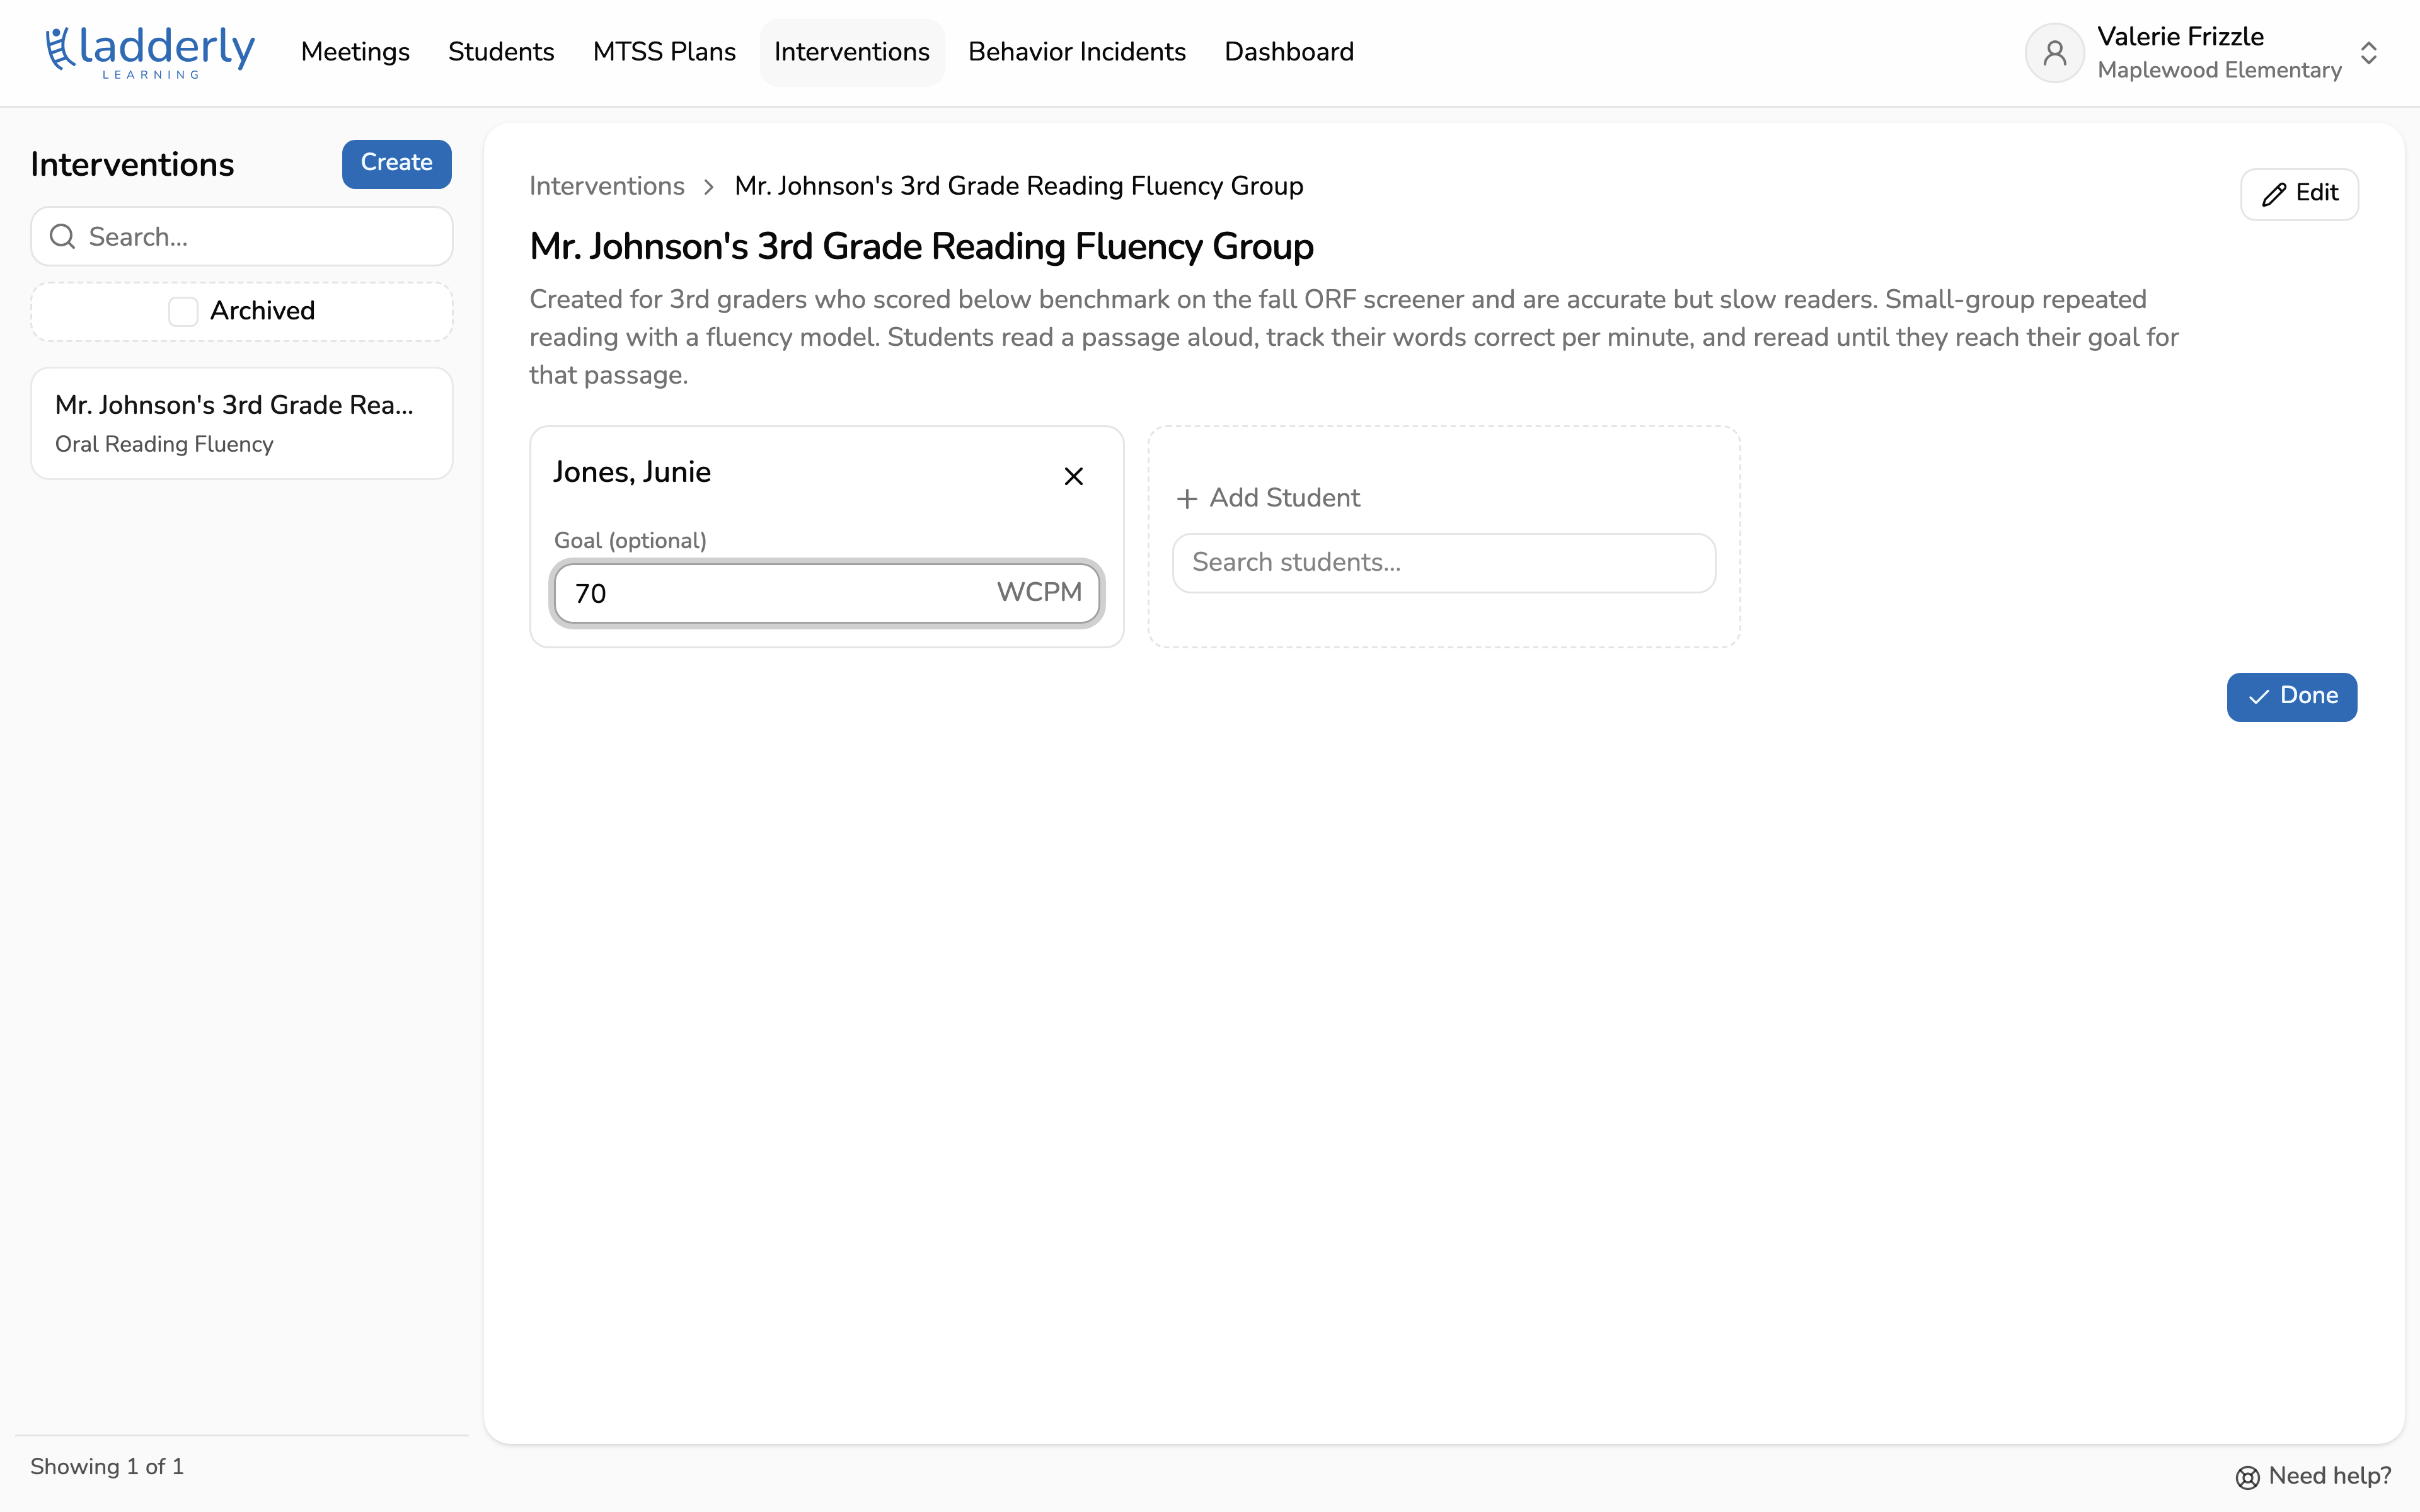
10. The intervention is ready
Each student gets a progress card. Use Progress Monitoring and Attendance to log each session, and Manage Students to change who is in the group.